Showing posts with label summer. Show all posts

Friday, October 2, 2020

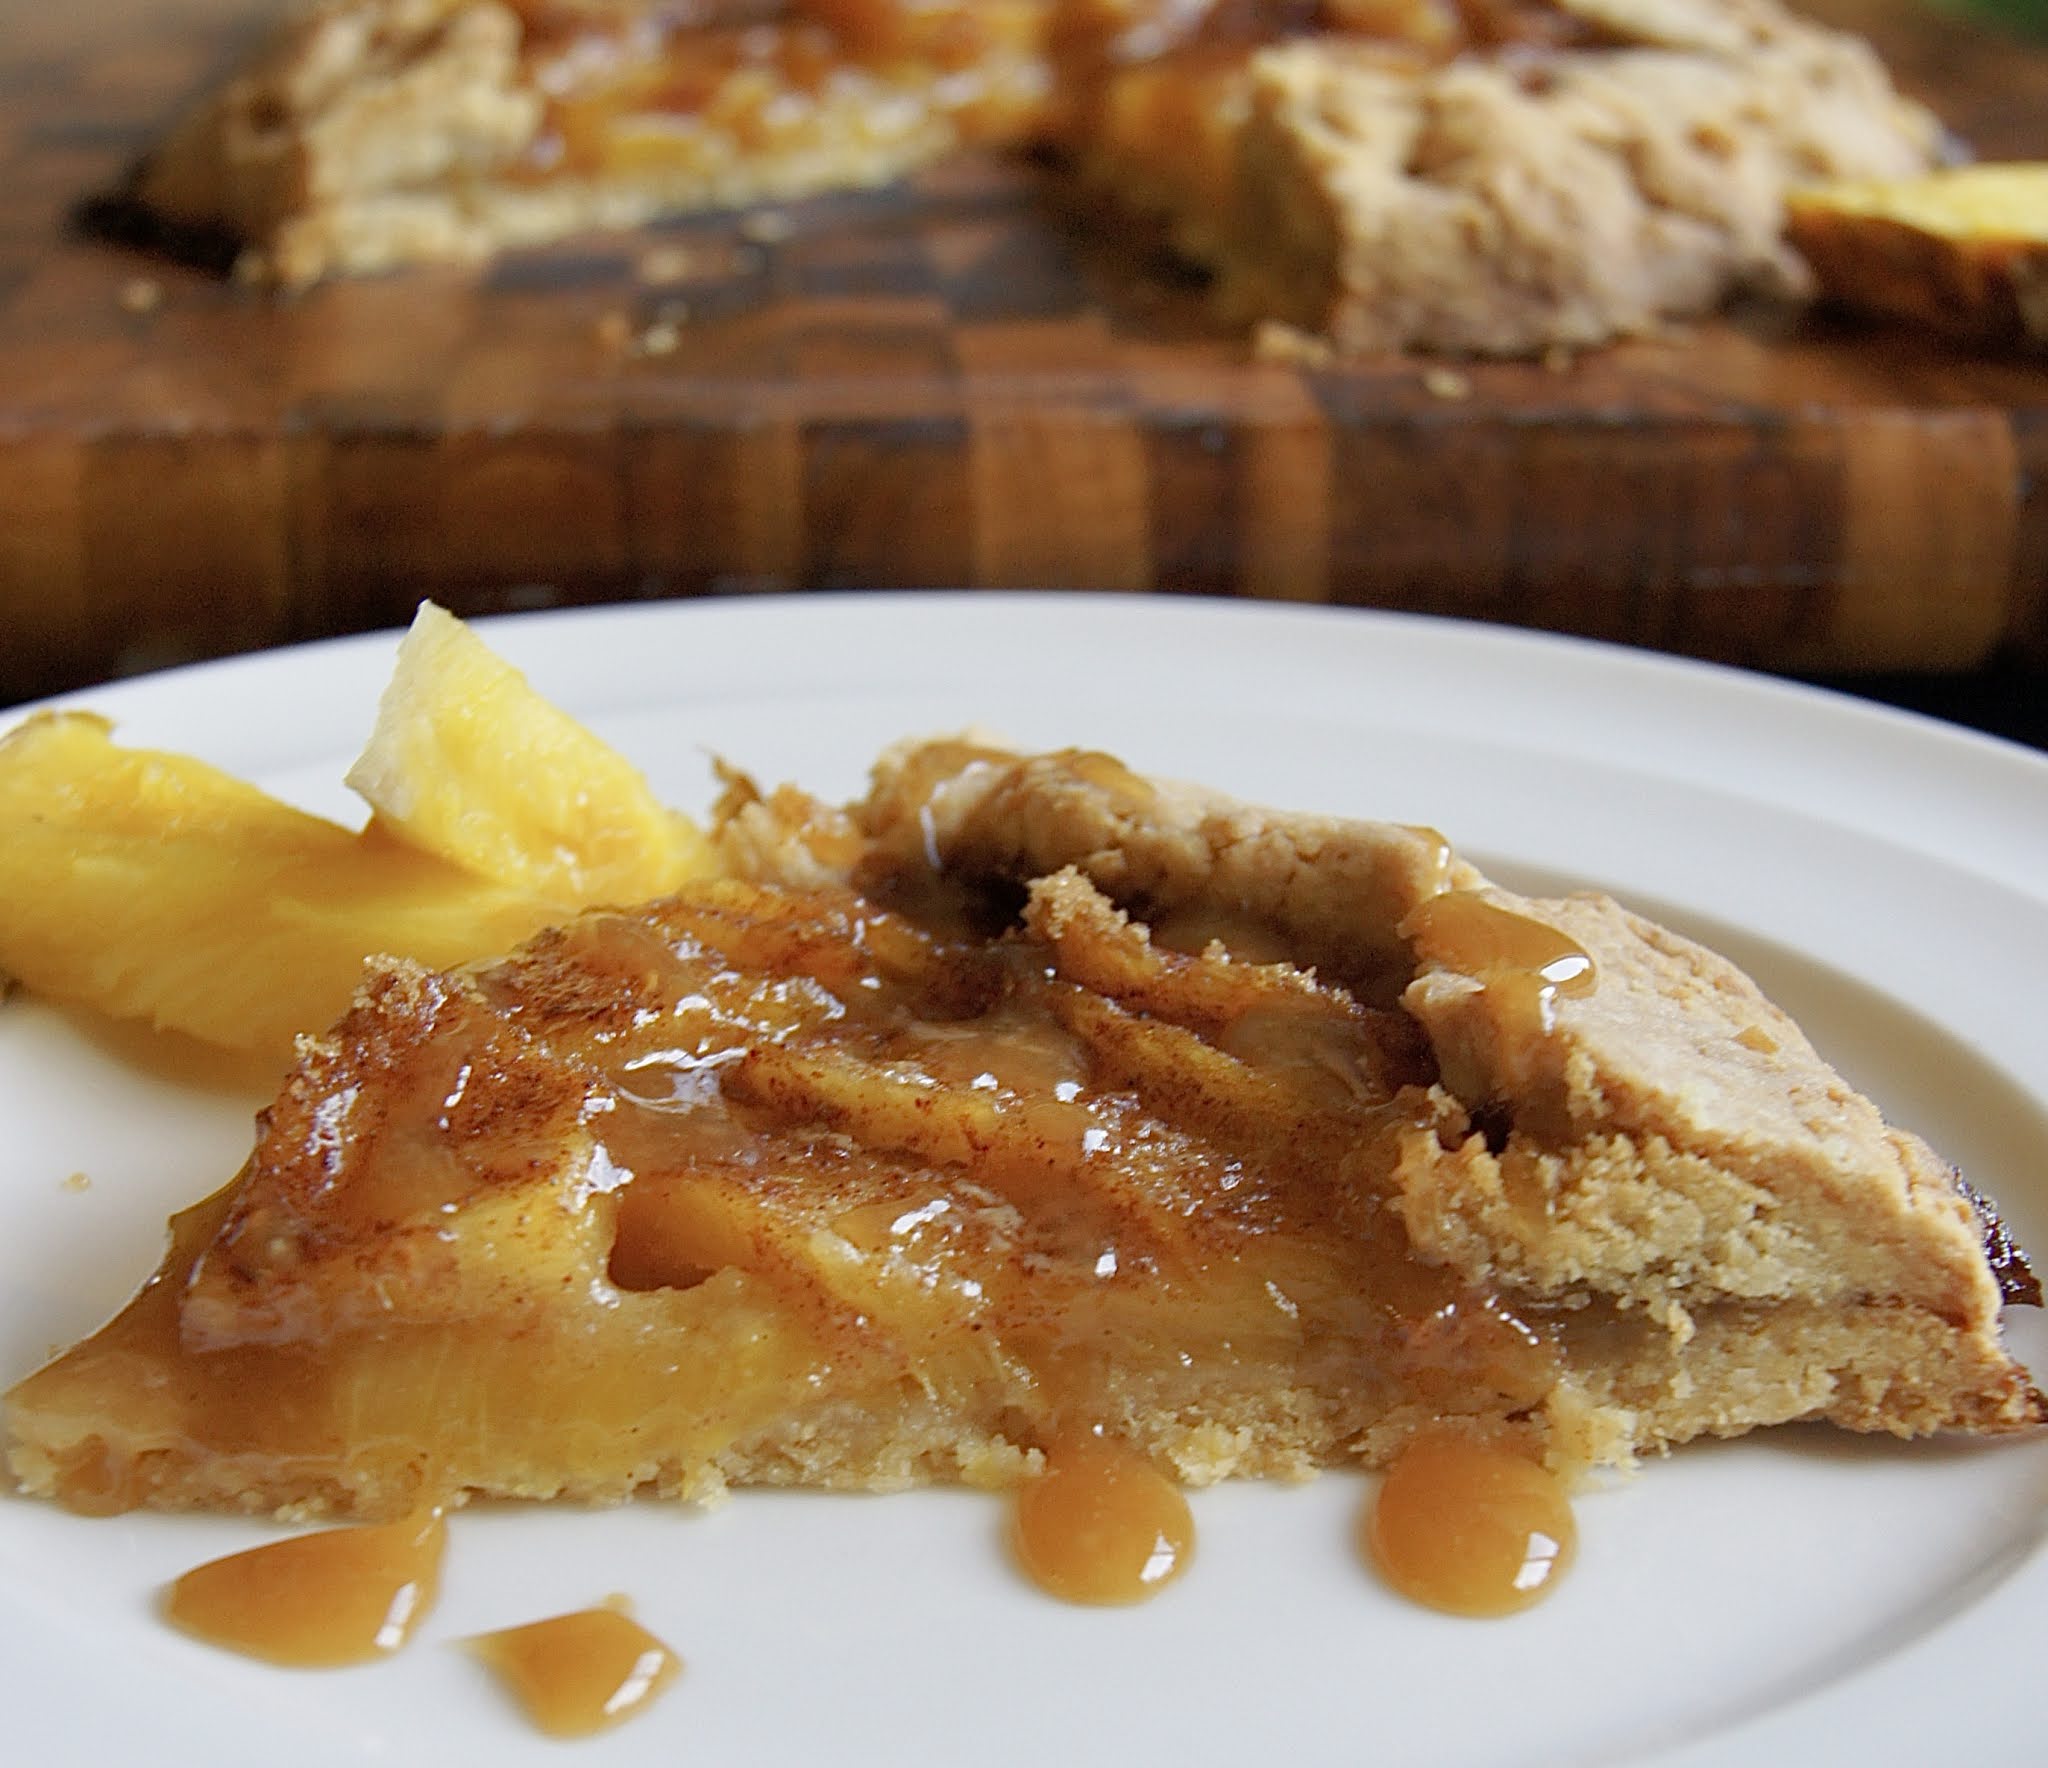
Pineapple Galette


If this were an ordinary year, my family would have been planning a trip to some warm location come fall and winter. But due to the current pandemic, we have been staying close to home and plan to do so for quite a while. So, since we can't be in the tropics, we are channeling tropical vibes and flavors in many of our dishes! 

This pineapple galette is one such dish. Filled with fresh pineapple, sweetened coconut flakes in the crust, and a good pinch of nutmeg, it is reminiscent of the homemade pineapple jam of my childhood in Trinidad - one that, as kids, we would slather unto toast for breakfast. As an added touch, I served it drizzled with a bit of caramel sauce, using this very easy recipe. Also, I am very proud to admit that my 5 year old, who is usually by ym side when I'm baking, offered the most helpful tip with the crust. Instead of trying to lift it unto the baking, simply place the baking sheet at the edge of the counter and gently slid the rolled out crust unto it. Easy squeezy, like he would say. 


Pineapple galette 

For the crust:
1 cup whole wheat pastry flour 
1/2 cup sweetened, shredded coconut 
5 tbsp butter, cut into cubed 
2 to 3 tbsp cold water

For the filling: 
2 cups sliced, fresh pineapple
1/3 cup brown sugar
2 tsp cinnamon 
1/2 tsp grater nutmeg 
2 tbsp cold cutter, cubed

To make the crust:
1. In a food processor, pulse the flour and shredded coconut together until you can no longer see whole shreds of coconut flakes. Add the cubed butter and continue pulsing until the mixture becomes crumbly and takes on the texture of course meal. With the motor running, add two to three tablespoons of ice cold water to the mixture, keeping the motor running just until the mixture begins coming together, not more than 20 to 30 seconds. 
2. Turn the mixture out unto a lightly floured surface, and using your hands bring together to form a ball. wrap with plastic wrap and refrigerate for 30 minutes. 

To assemble the tart:
1. Mix the sugar and spices in a bowl and set aside. 
2. On a lightly floured surface, roll the crust out into a 10 inch circle, about 1/4 inch thick. 
3. Carefully transfer the crust unto a lined baking sheet. (Alternatively, since the crust can be a bit soft and tricky to work with,  tape a sheet of parchment paper (the size of your baking sheet) unto your work surface. and roll out the dough onto the paper. Then, remove and discard the tape, and transfer the parchment paper together with the crust unto your baking sheet.)
3. Arrange the pineapple slices on the tart crust, leaving about a 2 inch border all around. Sprinkle the sugar mixture on top of the pineapple and dot with the cubed butter. Fold the border up over the edge of the pineapple filling, making sure to leave much of the fruit uncovered. Bake in a 375 degree oven for about 50 minutes until the crust is golden brown. Cool on a wire rack for 10 to 15 minutes before serving. 

Thursday, July 18, 2019

Summer Berry Pavlova


Almost every pavlova recipe begins with a brief history of the dessert, each one with a reference to its contested origin of either Australia or New Zealand. What is not contested, however, is the beauty and absolute deliciousness of this dessert. 

Making pavlova requires a bit of patience and could entail a few episodes of trial and error (it was not until my third attempt that I began to see decent results). This patience will be rewarded with the most luxurious of desserts that I think you would come back to every summer (to showcase those summer berries) or whenever the mood strikes.  


Summer Berry Pavlova 
Makes about 4 servings 

2 large egg whites
1/4 tsp cream of tartar
1/4 tsp salt
1/2 cup granulated sugar
1/2 tbsp cornstarch 
whipped topping
raspberry sauce 
fresh summer berries such as raspberries, strawberries and red currants

For the whipped topping:
1/2 cup heavy whipping cream 
2 tbsp sugar

For the raspberry sauce:
1 cup fresh raspberries
1/4 cup water
1 1/2 sugar 

1. Set the oven to 275 degrees F. Line a baking sheet with parchment paper, and set aside. 
2. Add the egg whites, salt, and cream of tartar to a stainless steel mixing bowl. Whisk at medium speed for about 3 minutes until foamy. Slowly increase the speed of the mixer to high, while adding the sugar and cornstarch. Continue to whisk until the mixture forms stiff peaks. 
3. Carefully spoon the mixture unto the parchment paper-lined baking sheet to form a raised circular disc of about 1 1/2 inch to 2 inches high. Place in the oven, and reduce the oven temperate to 250 degrees. Bake for 1 hour. Turn off the oven and let the pavlova cool completely. Once cooled, gently lift off from the parchment paper and place on a serving dish. Top with cream, raspberry sauce and fresh fruit, as desired. 

For the whipped topping: Whisk the whipping cream with an electric mixer. As it thickens, add the sugar and continue to whisk until just firm. 

For the raspberry sauce: Place all of the ingredients in a saucepan, and bring to a gentle boil. Stir well, crushing the raspberries as you go. Cook over a gentle simmer for about 3 to 4 minutes until the sauce thickens slightly. Remove from the heat and pass through sieve, discarding the seeds and pulp. 


Friday, August 29, 2014

Fresh Tomato Pizza


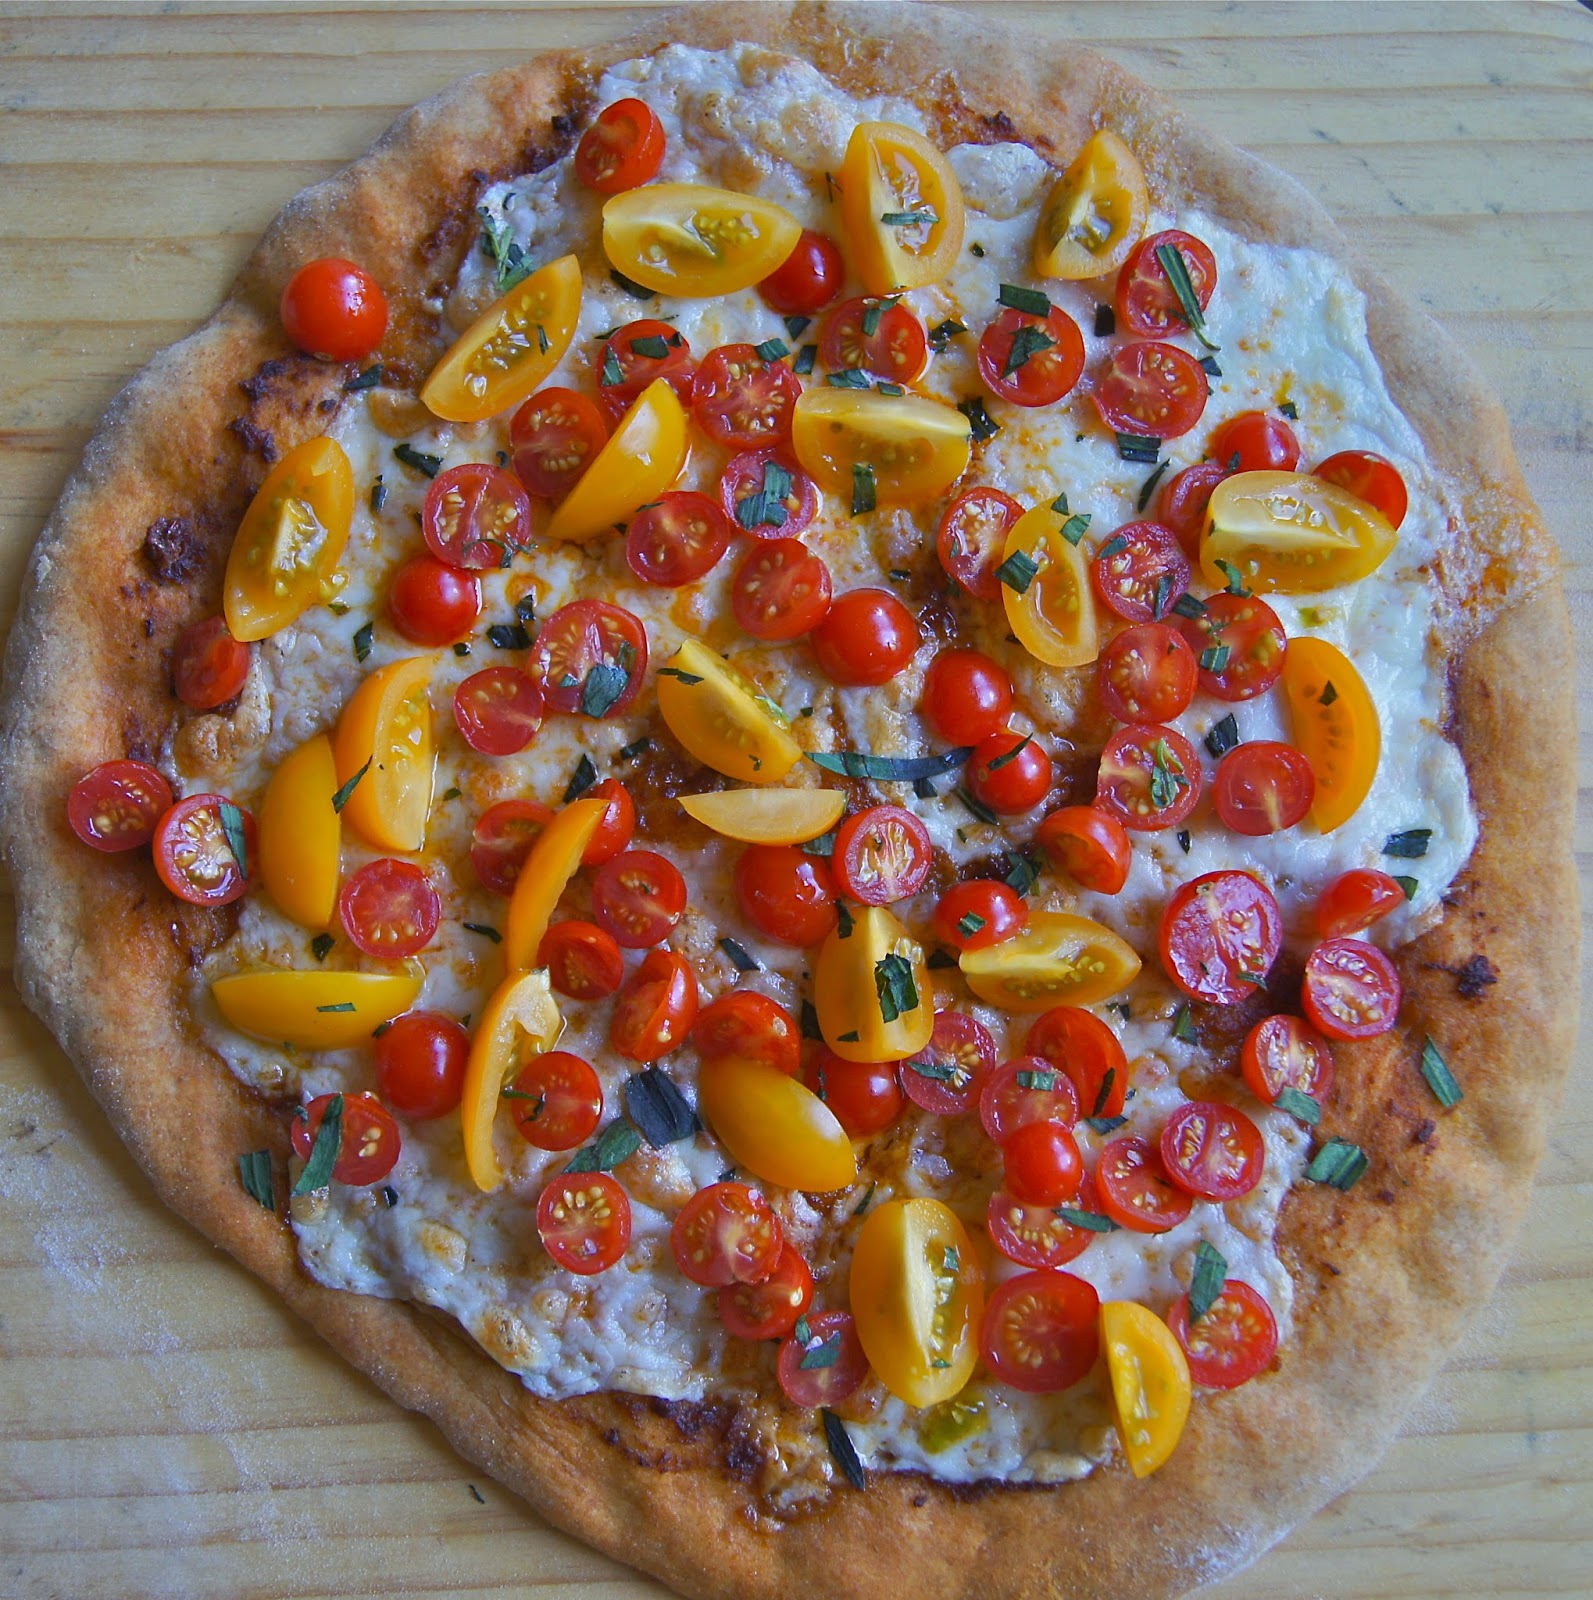
If you are what you eat, I might soon turn into a giant tomato. Exactly what kind of tomato is a good question. This summer, we experimented with growing tomatoes in pots, on the deck (up high and safe from our resident critters.) Four varieties: roma, beefsteak, cherry, and heirloom. Truth be told, we half-expected that they would not thrive very well given that, firstly, we were growing them in pots and, secondly, that tomato plants are, in general, susceptible to disease. We never expected that we would be reaping vine-ripened tomatoes all summer long.  And by extension, that we would be eating tomatoes all summer long. In cous cous, on bruschetta, in salads, in pasta - these past couple months have been a mini tomato festival at our house. 

As the nights here in Minnesota are getting cooler, the plants are beginning to show signs of the end. They are "thinning", and the leaves are drooping and turning a sort of blue-purple color. But, surprisingly, the cherry tomato plant is still bearing. I managed to pick quite a bit a few days ago, most of which ended up on this pizza. Instead of baking the tomatoes with the other toppings, I decided to put them on after the pizza had baked, in order to savor all of its freshness. For the crust, I used store-bought dough - this can be so convenient on weeknights. And I also added a bit of sun-dried tomato paste to the sauce, which, to me, makes a more flavorful sauce but is by no means necessary. 

Here's to the last few days of summer! 

Fresh Tomato Pizza
Makes one 10" pizza

pizza dough (enough to make one 10" pizza)
1 tbsp olive oil
1/2 cup pizza sauce 
2 tbsp sun-dried tomato paste (optional)
8-10 oz mozzarella, sliced
1/2 lb cherry tomatoes, halved

1. Set the oven to 450 degrees F. 
2. On a clean, floured surface, roll out the dough to about 10" in diameter. Transfer to a greased baking sheet. 
3. Drizzle the olive oil over the pizza dough and, using a pastry brush or the back of a spoon, spread evenly. Next, spread on the pizza sauce. (If using sun-dried tomato paste, stir this into the pizza sauce before spreading it on the pizza dough.) Arrange the mozzarella slices evenly on top. 
4. Bake until the crust is crisp and brown and the mozzarella is bubbly, about 15 minutes. 
5. Right before serving, top the pizza with the fresh cherry tomatoes.

Thursday, July 16, 2009

Fish Burgers with Avocado Sauce


For fish burgers, I prefer to use whole fish steaks rather than the traditional method of combining crumbled fish with breadcrumbs and eggs. Fish steaks just taste better in my opinion, and they provide more of that characteristic "juicy burger bite" than a soft fish patty can offer. Also, by using a marinade of a few simple ingredeints, you have a burger that is lighter in calories.
While this is an easy recipe, choosing the right type of fish is essential. Here, I opted for scarlet snapper steaks with the skin on. Snapper in general maintains its structure to high heat but, if unavailable, you can substitute other meaty fish such as swordfish or tuna; basically any fish you would grill.

Fish Burgers with Avocado Sauce
Serves four

FOR AVOCADO SAUCE
1 whole Hass avocado, halved, seeded and peeled
1/2 cup fat free greek yogurt
1 roma tomato, chopped
1 shallot, chopped
2 tbsp chopped cilantro
salt to taste

FOR BURGERS
4 snapper steaks about 1" thick (1 lb total)
6 cloves garlic
2 tbsp olive oil
1 tbsp fresh lemon juice
1 tsp chilli flakes (optional)
salt and pepper
4 whole wheat hamburger buns, toasted
baby lettuce

To make the avocado sauce:
Combine avocado, yogurt, tomato, shallot, cilantro and salt in a food processor until smooth. Refrigerate until ready to use.

To make the burgers:
1. Using a microplane or the fine side of a box grater, grate the garlic cloves. Combine grated garlic, olive oil, lemon juice, chilli flakes, salt and pepper. Coat each side of the fish steaks well with this mixture. Refrigerate for at least half and hour.
2. Set a skillet over medium high heat and, once hot, add just enough vegetable oil to coat the bottom. Place the fillets, two at a time depending on the size of the skillet, skin side down and cook for four minutes. Flip and finish cooking on the other side for another three to four minutes or opaque throughout. Remove to a paper towel.
3. To arrange the burgers, place a handful of baby lettuces on the bottom half of a burger bun. Top with one fish steak, a generous dollop of the avocado sauce, and the top half of the bun.