Showing posts with label cake. Show all posts

Friday, October 2, 2020

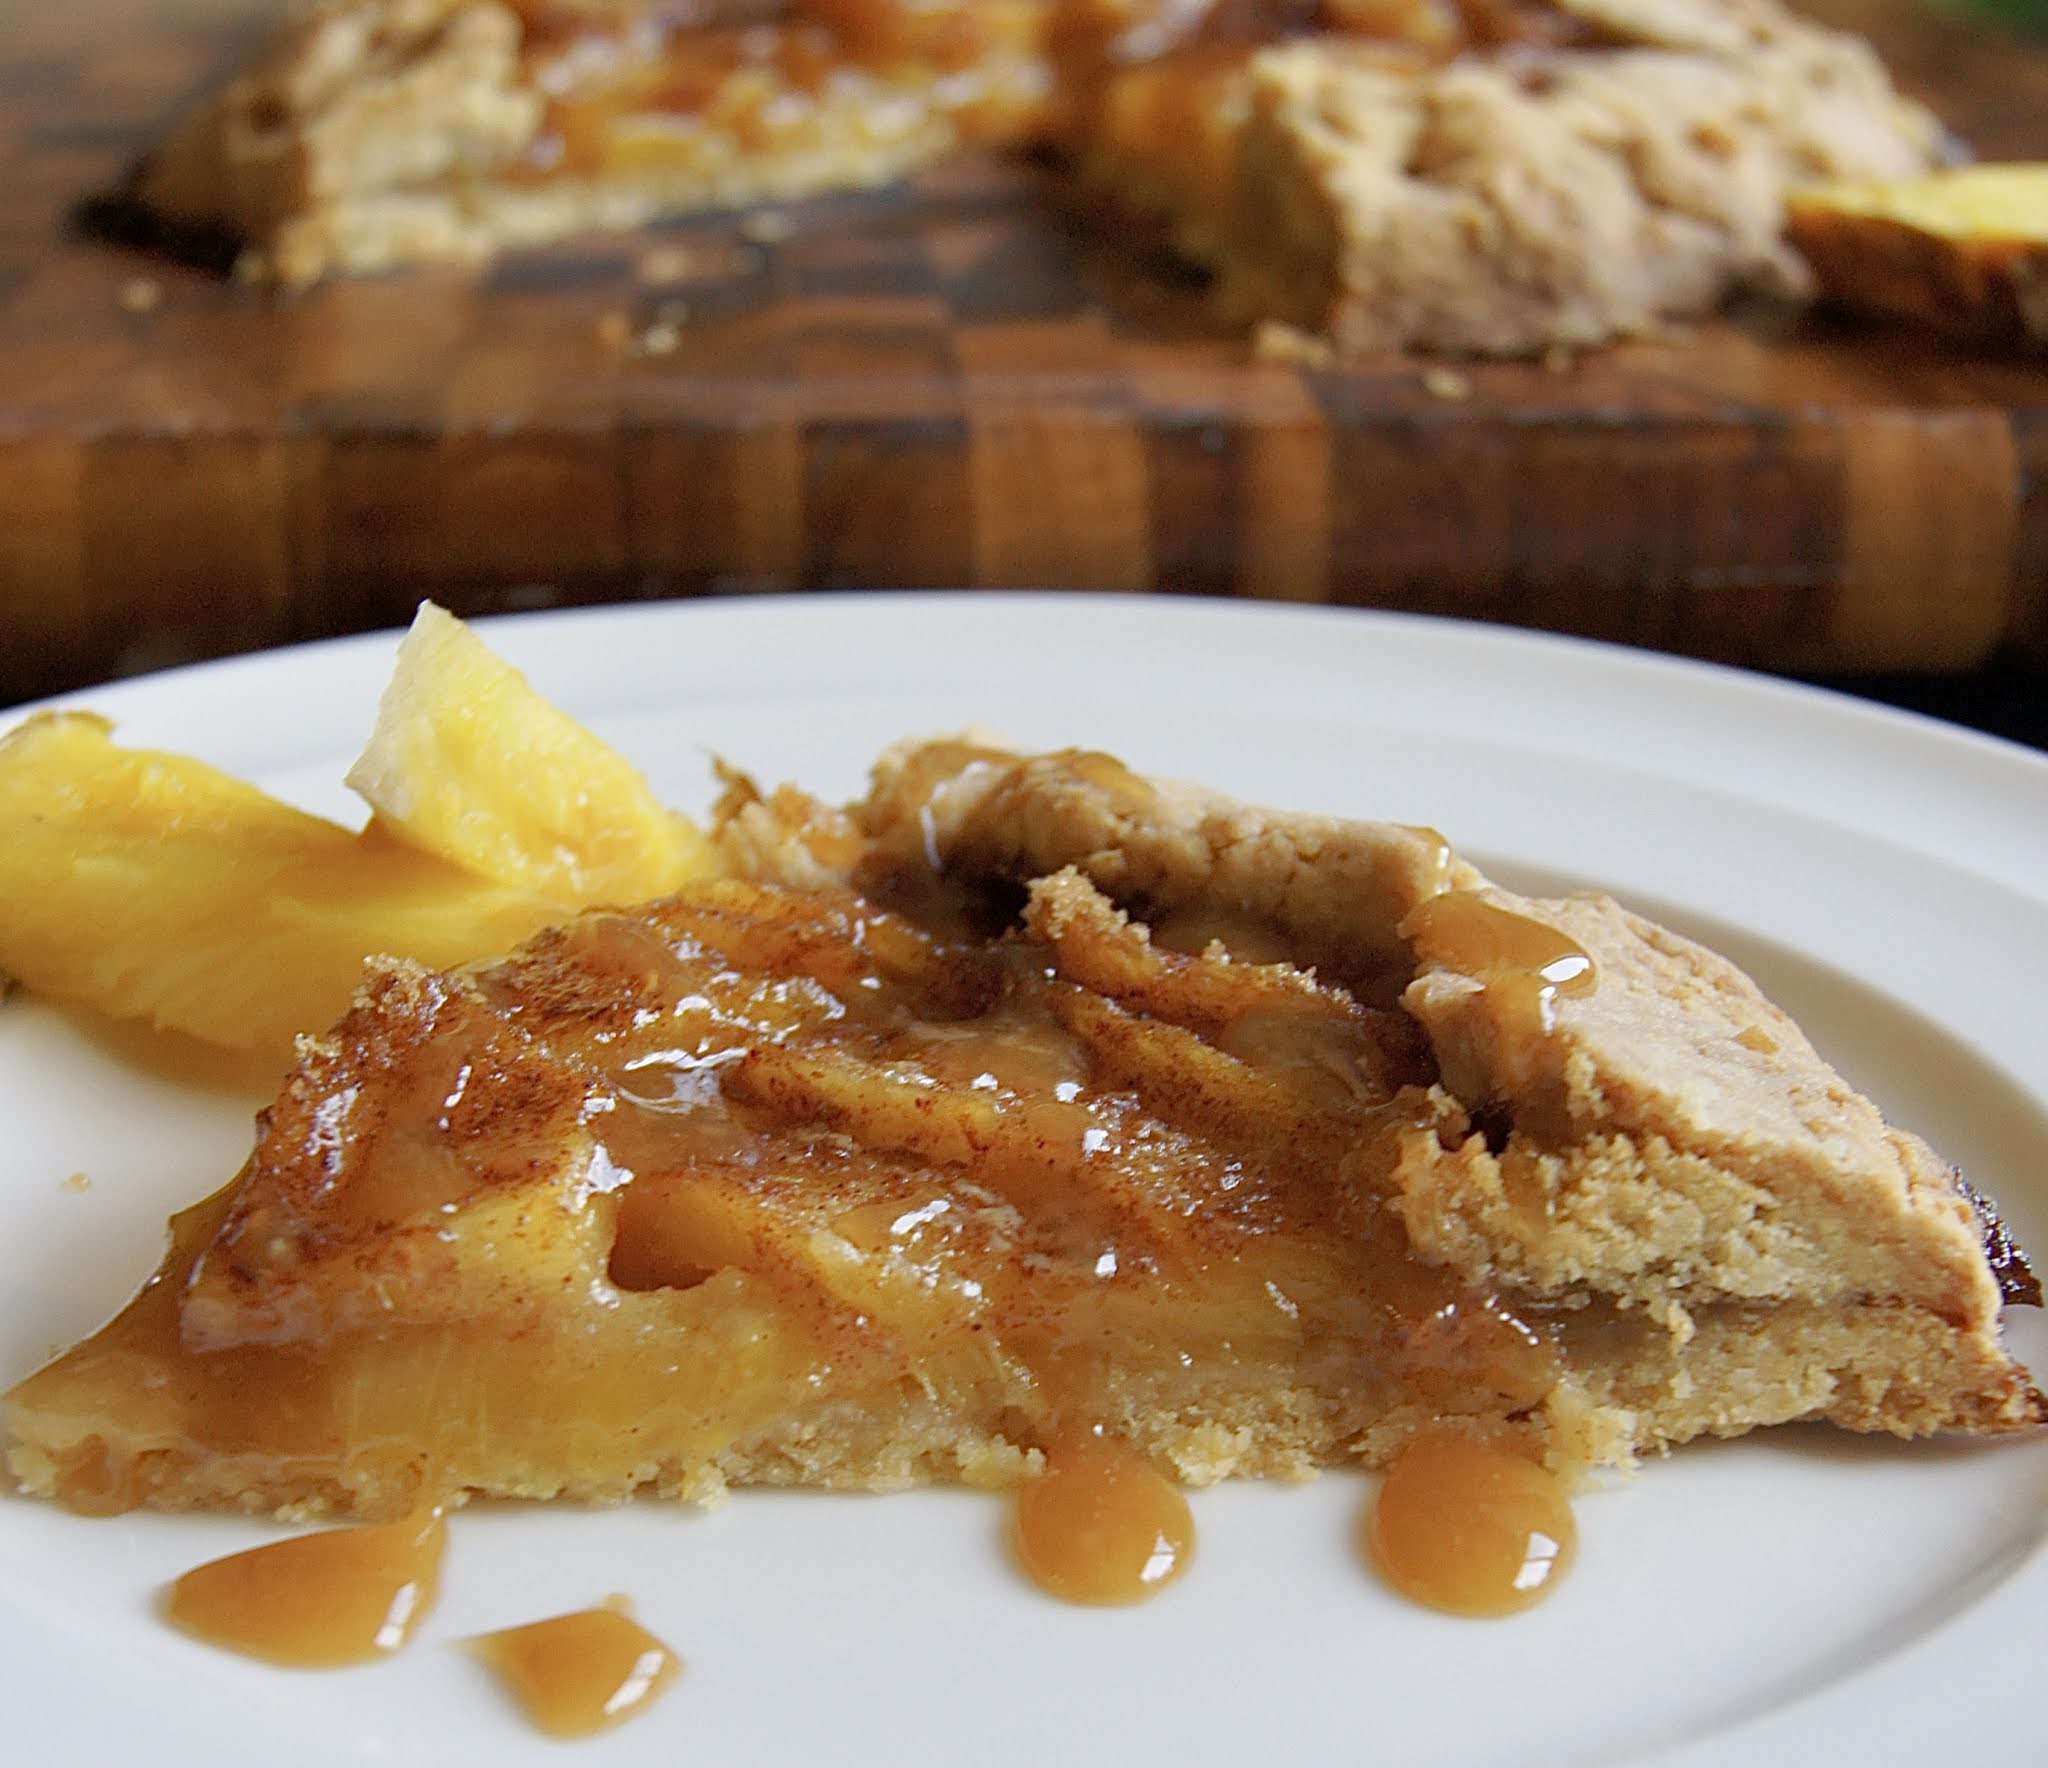
Pineapple Galette


If this were an ordinary year, my family would have been planning a trip to some warm location come fall and winter. But due to the current pandemic, we have been staying close to home and plan to do so for quite a while. So, since we can't be in the tropics, we are channeling tropical vibes and flavors in many of our dishes! 

This pineapple galette is one such dish. Filled with fresh pineapple, sweetened coconut flakes in the crust, and a good pinch of nutmeg, it is reminiscent of the homemade pineapple jam of my childhood in Trinidad - one that, as kids, we would slather unto toast for breakfast. As an added touch, I served it drizzled with a bit of caramel sauce, using this very easy recipe. Also, I am very proud to admit that my 5 year old, who is usually by ym side when I'm baking, offered the most helpful tip with the crust. Instead of trying to lift it unto the baking, simply place the baking sheet at the edge of the counter and gently slid the rolled out crust unto it. Easy squeezy, like he would say. 


Pineapple galette 

For the crust:
1 cup whole wheat pastry flour 
1/2 cup sweetened, shredded coconut 
5 tbsp butter, cut into cubed 
2 to 3 tbsp cold water

For the filling: 
2 cups sliced, fresh pineapple
1/3 cup brown sugar
2 tsp cinnamon 
1/2 tsp grater nutmeg 
2 tbsp cold cutter, cubed

To make the crust:
1. In a food processor, pulse the flour and shredded coconut together until you can no longer see whole shreds of coconut flakes. Add the cubed butter and continue pulsing until the mixture becomes crumbly and takes on the texture of course meal. With the motor running, add two to three tablespoons of ice cold water to the mixture, keeping the motor running just until the mixture begins coming together, not more than 20 to 30 seconds. 
2. Turn the mixture out unto a lightly floured surface, and using your hands bring together to form a ball. wrap with plastic wrap and refrigerate for 30 minutes. 

To assemble the tart:
1. Mix the sugar and spices in a bowl and set aside. 
2. On a lightly floured surface, roll the crust out into a 10 inch circle, about 1/4 inch thick. 
3. Carefully transfer the crust unto a lined baking sheet. (Alternatively, since the crust can be a bit soft and tricky to work with,  tape a sheet of parchment paper (the size of your baking sheet) unto your work surface. and roll out the dough onto the paper. Then, remove and discard the tape, and transfer the parchment paper together with the crust unto your baking sheet.)
3. Arrange the pineapple slices on the tart crust, leaving about a 2 inch border all around. Sprinkle the sugar mixture on top of the pineapple and dot with the cubed butter. Fold the border up over the edge of the pineapple filling, making sure to leave much of the fruit uncovered. Bake in a 375 degree oven for about 50 minutes until the crust is golden brown. Cool on a wire rack for 10 to 15 minutes before serving. 

Wednesday, September 25, 2019

Chocolate Zucchini Cake


This cake has two cups of zucchini nicely hidden in its chocolatey interior. But, please, do not tell that to my four year old. He has devoured may a slice without the slightest idea that his mummy is deceiving him. Obviously, this deception is for his own good - like many four year olds, it is a herculean task to get any sort of vegetables in his diet. Therefore, his mummy will continue to make zucchini chocolate cakes, I mean plain old chocolate cakes, as long as necessary. Not that I mind because this is an absolute cinch to make; simply a matter of adding a mixture of wet ingredients to a mixture of dry ingredients and popping it in the oven. Possibly the hardest part is the one hour it takes to bake plus the few minutes of cooling.

Chocolate Zucchini Cake 
Makes  one 9" x 3" cake

1 cup all purpose flour
1/3 cup white whole wheat flour*
1/2 cup unsweetened cocoa powder
2 tsp cinnamon
2 tsp baking powder
1/2 tsp baking soda
1/4 salt
2 eggs
1 cup brown sugar
1 cup vegetable oil
1 tsp vanilla
2 cups grated zucchini **

For the glaze
1/2 cup whipping cream
4 oz  semi-sweet chocolate chips

1. Preheat over to 350 degrees F, and spray a 9 x 3 inch loaf pan with cooking spray.
2. Combine the flours, cocoa powder, baking powder, baking soda, cinnamon and salt. Set aside.
3. In another bowl, combine the eggs, vegetable oil, sugar, and vanilla. Mix in the zucchini followed by the dry ingredients.
4. Pour into the prepared loaf pan and bake for about 50 to 60, until a cake tester comes out clean.  Cool thoroughly before glazing.

For the glaze:
Add the cream and chocolate chips to a double boiler. Stir until the chocolate chips have melted and a smooth glaze has formed.

* You can, by all means, use all purpose flour here. I like to substitute a little bit of whole wheat ever I can simply to bump up the fiber content of many of my baked treats, another little trick my four year old know soothing about.
**When measuring out the zucchini, it is important not to tightly pack the measuring cup, as this can result in too much moisture and ultimately your cake batter might over flow in the oven.  I would recommend placing your loaf pan unto a baking sheet to avoid having to do unnecessary clean up.


Monday, July 10, 2017

Raspberry Cake


It is only fitting that my previous post and this current one are about raspberries. After all, my blog entires have been few and far between ever since my life became consumed by a messy-haired, rosy-cheeked, ever-happy toddler. This same toddler is also a raspberry fanatic. He had been at the time of my previous post and and still is today. So, imagine his delight when, about a week ago, we took him to a raspberry patch to pick his favorite berries to his heart's content. Decked off in his favorite green rain boots and blue hat, he quickly got the gist of how to gently pluck the berries off the branch so that the hull remained, as well as discerning those that were ready to be picked from those that were not. Truth be told, I did not expect him to be able to fill up his basket but fill he did. He also knew, instinctively, that no amount of berry picking is complete with bit of tasting as you go. But in spite of all the tasting, we ended up taking home three pints of delicious local raspberries which was more than enough to make this equally delicious cake. A cake which,  incidentally,  is toddler approved. 


Raspberry Cake
Adapted from Epicurious

1 cup all purpose flour
1/2 tsp baking powder
1/2 tsp baking soda
1/4 tsp salt
1/2 stick unsalted butter, at room temperature
2/3 cup plus 1 1/2 tbsp sugar, divided
1/2 tsp vanilla 
1 egg
1/2 cup milk
1 1/2 to 2 cup fresh raspberries 

1. Preheat oven to 400 degrees F. Grease and flour a 9 inch round cake pan. 
2. Whisk together flour, baking powder, baking soda, and salt. 
3. In another bowl, beat butter and 2/3 cup of sugar with and electric mixer until pale an fluffy, about 2 minutes, then add the vanilla and egg. Continue to beat well. 
4. Turn the electric mixer speed to low, and mix in the flour mixture in 3 batches, alternating with  milk, and beginning and ending with the flour mixture. 
5. Pour the batter into the cake pan, gently smoothing the top. Scatter the raspberries evenly over the top and sprinkle with the remaining sugar. 
6. Bake until the  cake is golden and a toothpick inserted into the middle comes out clean, about 25 to 30 minutes. Cool in the pan for 10 minutes, then turn out unto a wire rack and cool for an additional 10 to 15 minutes. 


Sunday, February 13, 2011

Chocolate Cupcakes with Cream Cheese Frosting


Yesterday evening was spent with a bunch of friends, just laughing and dancing and eating and drinking. Then I got to spend all day today with Saul and Charlie. And I cannot think of a better way to spend a Valentine's weekend. And to top it off, we had cupcakes!

Chocolate Cupcakes with Cream Cheese Frosting
(Adapted from Bon Appetit)
Makes 10

1/4 cup natural unsweetened cocoa powder
1 oz milk chocolate
1/4 cup boiling water
1/4 cup low fat milk
2/3 cup cake flour
1/2 tsp baking soda
1/4 tsp salt
2/3 cup brown sugar
1/4 cup canola oil
1 large egg
1/2 tsp vanilla extract

1. Position rack in center of oven and preheat to 350 degrees F. Line muffin pans with cupcake liners.
2. Combine cocoa powder and milk chocolate in medium bowl and pour the boiling water over. Whisk until mixture is smooth then whisk in the milk.
3. Combine flour, baking soda, and salt in another medium bowl.
4. Using an electric mixer, beat sugar, oil, egg, and vanilla in a large bowl until well blended. Whisk in the cocoa mixture followed by the flour mixture. Beat until blended (batter will be thin.) Pour into prepared cupcake cups (fill each half way up) and bake for 15 minutes until a tester inserted into the center of one comes out clean. Cool completely on a wire rack before frosting. (See here for frosting recipe. )

Friday, October 3, 2008

I like family with my cheesecake please


If culinary decadence could be described in one word, it would be cheesecake. I know, I know, cheesecake puts a wrench in the raison d'etre of my blog but this is not your ordinary cheesecake. (Who says a healthy lifestyle does not include cheesecake anyway?) From the moment I made the decision to start a food blog, I have enjoyed the process of relearning the art, the science and the history behind many traditional recipes. Not just relearning how to make them but how to incorporate them as part of a healthy lifestyle, that is, as an unforgettable taste sensation which which does not wreck havoc on our efforts to stay or get healthy . No other dish has proven to be as much of a challenge in this aspect than cheesecake. Yes, I could have just whisked together fat free cream cheese, some eggs, flavorings, baked it, chilled it , and voila, "healthy" cheesecake. But, a cheesecake is more than just a disc of sweetened cream cheese. Have you ever had a slice only to taste an overwhelming amount of sugar, nothing else? I have had this happen to me on occasion. Or, have you ever had a slice with a texture that was hard to discern from that of card board? Acheiving the perfect texture, together with the lusciousness that is characteristic of this grand daddy of desserts, is a task too often not afforded it rightful reverence.

In the two weeks I spent experimenting with different sweeteners, different proportions of fat, etc, a couple valuable tips were learnt. (1) Brown rice syrup is a great sweetener when used to sweeten desserts. Not only did it enhance the chocolate flavor in this recipe but it also has a low glycemic rating. It contains approximately 50 % carbohydrates, 45 % maltose an 3 % glucose. With low glycemic foods, there is a steady release of sugar into the blood stream as opposed to high glycemic foods that inject large amounts of sugar causing a high spike in blood glucose levels which can then increase insulin levels, the number one reason people develop type two diabetes. (2) Blending, as opposed to using a hand or stand-mixer, produces a more "velvety" texture. I was unable to get as smooth a filling with a hand mixer as I was with the blender. In the end, I found that making a healthy, decadent dessert takes sufficient preparation, and if you're like me and want to experiment with flavors, a little creativity. 

It also helps to have a goal or company to entertain. I specifically made this dessert for tonight because, in less than eight hours, my father and my youngest sister will be here. I will be seeing them for the first time in four years. Well, I've "seen" them via the internet, but to be in the same country, the same city, under the same roof after so long...it is almost overwhelming. It feels like a dream so I won't allow myself to be ecstatic until I know for sure that their plane has landed at MSP airport. Strangely though, for the first time in my adult life, I don't know what to cook. A complete blank. What does one prepare on an occasion such as this? At least I have a cheesecake.


Mocha Cheesecake

Crust
2/3 cup graham cracker crumbs
2/3 cup matzo meal
1/3 cup dark brown sugar
1 tsp vanilla extract
1 egg white
2 tbsp canola oil

Filling
1/2 cup milk
2/3 cup dark chocolate chips
2 tbsp instant espresso
2 tbsp water
8 oz fat free cream cheese
1/3 cup mascarpone cheese
1/4 cup brown rice syrup
1 egg
1 tbsp corn starch


Set oven to 350 degrees F. Spray a 9" spring form pan or pie dish with cooking spray. To prepare crust: combine all ingredients well, until the crumbs clump together easily. Pour out unto the greased pan and using your finger tips or the back of a spoon, press along the bottom and half way up the sides. Bakes for 15 minutes and set aside until filling is ready.

To prepare filling: In a heavy saucepan over medium low heat, pour milk and chocolate chips. Stir continuously until chocolate has melted. Dissolve instant espresso in 2 tbsp warm water and add to milk and melted chocolate. Stir, remove from heat and allow to cool for at least 10 minutes.

Add the remaining ingredients to a blender and blend until smooth. With the pour lid off, slowly pour in the chocolate mixture and continue blending until fully combined. Pour into the prepared crust and set in a water-bath. If using a spring form pan, remember to seal the bottom with aluminum foil to prevent the water from seeping in. Bake for one hour, then cover in plastic wrap and refrigerate overnight or for at least four hours before serving.

Monday, September 15, 2008

Come mister tally man, tally me banana...crumb cake


Besides the beach, there is nothing more synonymous of the tropics than bananas. In Trinidad, where there are many varieties of this fruit, you can find a plethora of dishes featuring bananas. Cooked at the three main stages of ripeness: unripe, just ripened, and very mature; in stews, soups, au gratin, even for breakfast. When we were both toddlers, my sister and I graciously devoured my grandmother's "banana pot" for breakfast. Made with a variety of small bananas called chiquitos, salted cod fish, fresh tomatoes, onions and local herbs; this was regular weekend breakfast fare in our town.  

Interestingly, as Trinidadians we never tire of bananas in our diet, so ingrained is it within the culture. Although oil and natural gas are now our two main exports, bananas were at one point a major source of revenue.  As in American homes, there might be a bowl of apples sitting on the kitchen counter, in Trinidad there would be a bunch (or as it is called in the country side, a "hand") of bananas.

Recipes for banana breads and cakes also abound. Within my own extended family, there might be enough for a recipe book! My own recipe is extraordinarily moist (if I may say so myself.) So delicious, with  just the right amount of sweetness, and just the right amount of crunch; I dare you to have just one slice. I took a different route with the topping. Traditionally, crumb cakes are topped with a mixture of  approximately equal parts flour, sugar and butter. Here, less than two tablespoons of unsalted butter is combined with pecans for an irresistible crunch. Throw in a pinch of freshly ground nutmeg and you would be singing too!

                                                                       Pecan crumb topping

Banana Crumb Cake
Makes one 9" cake 

1 1/2 cups flour
1 1/2 tsp baking powder
1/2 tsp baking soda
1/4 tsp salt
2 tsp ground cinnamon
1/2 tsp ground nutmeg
2 tbsp unsalted butter
2 tbsp low fat cream cheese
2/3 cup brown sugar
3/4 cup low fat evaporated milk
1 tsp vanilla extract
2 large bananas, mashed
2 large egg whites

1. Set oven to 300 degrees F. Spray a 9 inch spring form cake pan with cooking spray and flour lightly. Set aside.
2. Combine flour, baking powder, baking soda, salt, cinnamon and nutmeg. Set aside.
3. Whisk eggs whites until stiff peaks form.
3. In another large mixing bowl, cream together butter, cream cheese, and sugar. Add evaporated milk, vanilla extract, and mashed bananas . Whisk together until smooth.
4. Slowly whisk in flour mixture in two installments, thoroughly incorporating each installment into the batter but being careful not to over-mix.
5. Fold in egg whites, also doing this in two installments.
6. Pour into a 9 inch cake pan. Sprinkle pecan topping over top (see recipe below.) Bake at 300 degrees F for 1 hour and 10 minutes. Set cake in pan on wire rack and cool for 15 to 20 minutes before removing sides of pan.


Pecan Crumb Topping
1 cup whole pecans
1 1/2 tbsp softened unsalted butter
2 tbsp brown sugar
2 tbsp all purpose flour

Coarsely chop or grind pecans in a food processor. Combine with the remaining ingredients to to a crumb-like texture.

Friday, August 15, 2008

Saul's Birthday Cake

Today is Saul's birthday! Here is the cake I made for him.


Vanilla Cake with Fresh Raspberry Filling

1 1/3 cups cakes flour
1 tsp baking powder
1/2 tsp baking soda
1/4 tsp salt
1/4 cup unsalted butter, softened
1/4 cup part skimmed ricotta cheese
1 cup dark brown sugar
1 vanilla bean pod
1/2 cup low fat evaporated milk
4 eggs whites
1/8 tsp cream of tartar

Filling
1/2 cup fat free cream cheese
1/4 granulated brown sugar
1 pint fresh raspberries (plus more for garnish)

Frosting (see notes below)
8 oz fat free cream cheese, softened
2/3 cups plus 4 tbsp confectioner's sugar, softened. See notes. 
1 tsp pure vanilla extract


1. Set oven to 350 degrees F. Grease and flour two 8 inch cake pans. Set aside.
2. Sift together cake flour, baking powder, baking soda and salt. Set aside. 
3. With an electric hand mixer, whisk together butter and ricotta cheese. Add 3/4 cup of the sugar and cream together until the mixture becomes fluffy and has lightened in color, up to three minutes. 
4. Split the vanilla bean pod and carefully scrape out all the "pulp". Add vanilla "pulp", evaporated milk, and vanilla extract. Mix well. In two batches, add flour mixture, beating well between additions. 
5.  In a separate bowl, whisk eggs whites and cream of tartar until medium stiff peaks form. Add remaining 1/4 cup of sugar and continue to whisk until stiff peaks form. Mix in a half of eggs whites into  batter, until properly incorporated. Gently fold in the remaining half. 
6. Divide the mixture into two 8" cake pans, previously greased and floured. Bake at 350 degrees F for 20 minutes or until a toothpick inserted in the center comes out clean.  Carefully remove the cakes from pans and cool completely on wire racks. 
7. To assemble: Place one cake round on a cake dish or cake stand. Spread filling mixture evenly on top, being careful not to spill down the sides. Place the second cake round on top of the filling. Cover with frosting. Garnish with reserved raspberries.


To prepare filling:
Whisk together sour cream and sugar. Gently fold in whole raspberries.

To prepare frosting:
Whisk together all ingredients until light and fluffy.

Notes:
1. To sweeten the frosting, you can use up to 1 cup of confectioner's sugar. I achieved the right level of sweetness with a little less. 
2. You can also shape the cakes into squares the way I did here. 
3. I tend to use dark brown sugar in most of my recipes because I find it enhances both the flavor and color. However, light brown sugar or granulated sugar can be substituted. 

Monday, June 9, 2008

Chocolate Chiffon Cake

What is it about cakes that can turn us from serious-minded, strong, independent adults to salivating, oogling, impatient eight year olds? Typically, cakes are not regular fare in my kitchen for the simple reason that we would have it for breakfast, lunch and dinner. My fiance is a little more well disciplined than I am; it is easy for him to just say "no." Not the same with me; in a diabetes-free, high cholesterol-free world, cake would be my meal of choice. When it comes to dessert, I lose all sense of decorum.  


Cooking is my avenue of expression, a beautiful kitchen always catches my attention, I have an addiction to shopping for kitchen appliances, but putting together a beautiful cake takes the cake for me, pun intended. Suffice it to say, the ability to create a a breathtaking, delicious, double layered cake that is actually healthier than a similar looking cake at your neighborhood bakery is the icing on my cake, pun intended again. Healthier because no butter, only a quarter cup of oil and two egg yolks constituted the bulk of its fat content. The secret to obtaining the moistness and lightness in my recipe was brewed coffee and fluffy clouds of egg whites.


Chocolate Chiffon Cake

1/2 cup cocoa powder
1 1/2 cups cake flour
1 cup sugar
2 tsp baking powder
1/2 tsp baking soda
1/2 tsp salt
8 egg whites
1 tsp cream of tartar
1/4 cup canola oil
1/2 cup brewed coffee
1/4 cup cream
1/2 cup dark chocolate chips
1 tsp vanilla extract
2 egg yolks

Berry filling:
1/2 cup mixed berries
1/2 cup fat free whipped topping

Cream cheese maple frosting:
2 cups fat free whipped topping
1 cup low fat cream cheese
3 tbsp maple syrup


1. Set oven to 325 degrees F. Spray two 9" cakes pans with cooking spray and flour well.
2. Sift together cocoa powder, flour, baking powder and baking soda. Set aside.
3. In a standing mixer, beat egg whites. Once soft peaks have formed, add cream of tartar and continue beating until stiff peaks form.
4. Meanwhile, in a double boiler melt chocolate chips. Add cream as soon as the chocolate begins to melt and mix until chocolate and cream are totally combined. Remove bowl from heat and add sugar. Mix until combined.
5. To sugar chocolate mixture, add coffee, vanilla extract and canola oil. Mix well.
6. By this point, the chocolate mixture should have cooled enough to add the egg yolks without scrambling them. Add yolks and combine well.
7. Add flour mixture to chocolate mixture in two installments. Make sure flour is totally absorbed.
8. Mix in 1/3 of egg whites to flour and chocolate mixture, stirring until no white streaks are visible.
9. Fold in second third of egg whites, again until no white streaks are visible. Finally, fold in last third, this time being careful not to deflate the batter.
10. Pour into prepared cake pans and bake for 25 minutes or until a toothpick comes out clean.
11. Remove cakes from oven and set pans on wire rack for 5 minutes. Invert cakes unto the wire racks ad allow to cool completely before assembling.

To prepare filling:
Puree berries, then fold in whipped topping. Set in refrigerator until ready to assemble cake.

To prepare frosting:
In a large mixing bowl, combine all ingredients.

To assemble cake:
1. Place one cake layer in the middle of a cake stand.
2. Spread berry filling unto bottom cake layer, making sure that it does not run down the sides.
3. Place second cake unto first. Pour all of the frosting unto the top of the cake. Working with a thin slanted spatula, spread frosting over the top and down the sides.
4. Decorate with fresh berries and sliced almonds if available. Sprinkle with cocoa powder.

Friday, May 9, 2008

I'm Seeing Red


Strawberry Shortcake

Makes about 10


Strawberry sauce:

3 cups fresh strawberries

2 tbsp pomegranate juice

2 tbsp honey ( or more depending on sweetness of strawberries)

1/2 tsp balsamic vinegar 

pinch of salt


Biscuit:

1 cup all purpose flour

1/2 cup whole wheat pastry flour

1/3 cup sugar

1 tsp baking powder

1/4 tsp baking soda

1 tsp ground cinnamon

1/2 cup cream

1/3 cup fat free ricotta cheese

1 tsp real vanilla extract

1 tbsp cream for brushing tops

extra sugar for sprinkling


Strawberry cream:

2 cups fat free cool whip

6 to 8 fresh strawberries


To prepare sauce:

Wash, hull and slice strawberries. Place in bowl together with pomegranate juice, honey, balsamic vinegar and salt. Mix and set aside. (This can be done up to a day ahead.)


To Prepare Biscuit: 

1. Set oven to 425 degrees F. 

2. In a large mixing bowl, combine all purpose flour, pastry flour, sugar, baking powder, baking soda, and cinnamon. 

3. In a separate bowl, combine cream, ricotta cheese and vanilla extract. 

4. Pour ricotta mixture into flour mixture and, using a spatula, combine until all of the liquid has been absorbed. Then, lightly knead until fully incorporated to form a ball. 

5. On a lightly floured surface gently roll out dough to form a 1" thick circle. 

7. Using a 2 1/2 " cookie cutter, cut  into 10 rounds. 

8. Place biscuit rounds on a well greased cookie sheet. Brush tops with cream and sprinkle with sugar. Bake for 10 minutes. 

9. Immediately remove from cookie sheet and cool on a wire rack.


To prepare cream topping: 

1. Wash and hull strawberries and puree in food processor or blender. Empty to bowl and fold in cool whip.


To assemble shortcake:

1. Using a fork, pierce around center of biscuit and separate into two halves. 

2. Drizzle some strawberry syrup unto halves and place bottom half on a serving plate. 

3. Spoon a tablespoon of strawberry sauce onto bottom biscuit half, followed by a dollop of strawberry cream and top with the top side of biscuit.  Serve with fresh strawberries on the side. 


Refreshing Watermelon Soup

Serves 4 to 5


5 - 6 cups cubed and seeded watermelon, chilled

4  mint leaves, plus more for garnish 

1/2 tsp ground ginger

1 tbsp honey

dash aromatic bitters (optional)

watermelon balls (optional) 


1. Combine all ingredients, except watermelon balls, in blender and puree until smooth.

2. Serve with watermelon balls and garnish with mint leaves.