Showing posts with label exotic. Show all posts

Friday, October 2, 2020

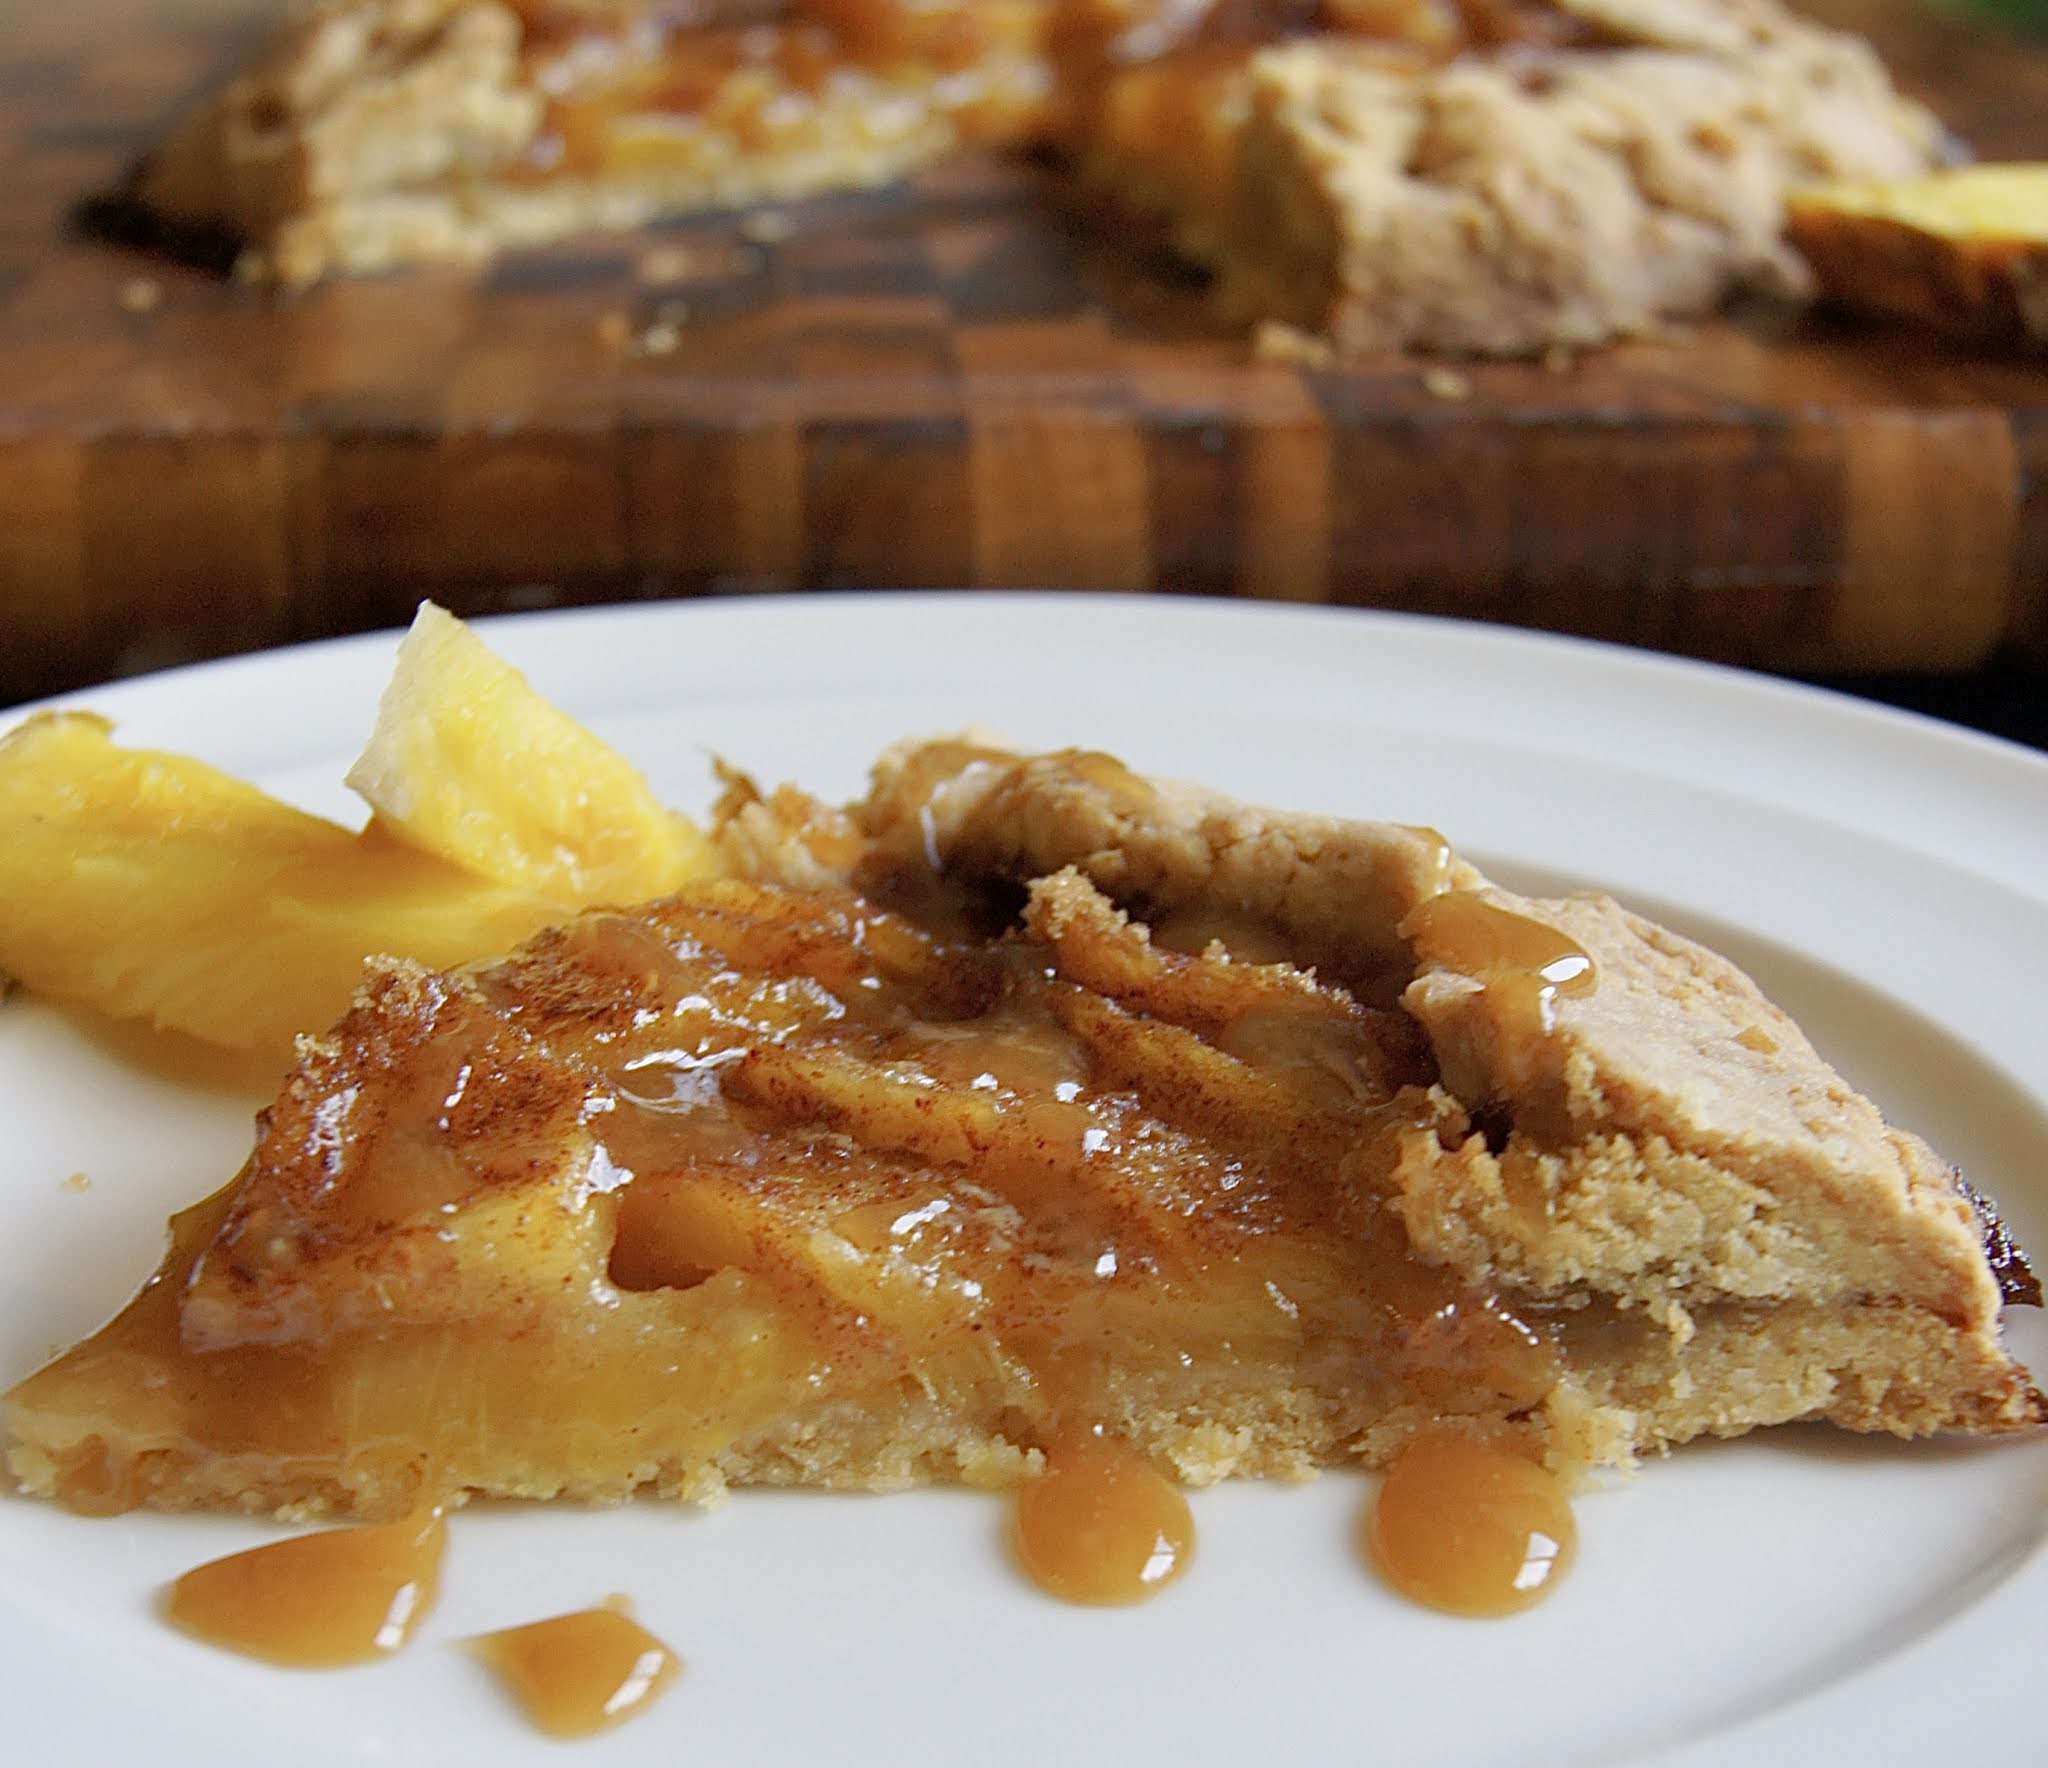
Pineapple Galette


If this were an ordinary year, my family would have been planning a trip to some warm location come fall and winter. But due to the current pandemic, we have been staying close to home and plan to do so for quite a while. So, since we can't be in the tropics, we are channeling tropical vibes and flavors in many of our dishes! 

This pineapple galette is one such dish. Filled with fresh pineapple, sweetened coconut flakes in the crust, and a good pinch of nutmeg, it is reminiscent of the homemade pineapple jam of my childhood in Trinidad - one that, as kids, we would slather unto toast for breakfast. As an added touch, I served it drizzled with a bit of caramel sauce, using this very easy recipe. Also, I am very proud to admit that my 5 year old, who is usually by ym side when I'm baking, offered the most helpful tip with the crust. Instead of trying to lift it unto the baking, simply place the baking sheet at the edge of the counter and gently slid the rolled out crust unto it. Easy squeezy, like he would say. 


Pineapple galette 

For the crust:
1 cup whole wheat pastry flour 
1/2 cup sweetened, shredded coconut 
5 tbsp butter, cut into cubed 
2 to 3 tbsp cold water

For the filling: 
2 cups sliced, fresh pineapple
1/3 cup brown sugar
2 tsp cinnamon 
1/2 tsp grater nutmeg 
2 tbsp cold cutter, cubed

To make the crust:
1. In a food processor, pulse the flour and shredded coconut together until you can no longer see whole shreds of coconut flakes. Add the cubed butter and continue pulsing until the mixture becomes crumbly and takes on the texture of course meal. With the motor running, add two to three tablespoons of ice cold water to the mixture, keeping the motor running just until the mixture begins coming together, not more than 20 to 30 seconds. 
2. Turn the mixture out unto a lightly floured surface, and using your hands bring together to form a ball. wrap with plastic wrap and refrigerate for 30 minutes. 

To assemble the tart:
1. Mix the sugar and spices in a bowl and set aside. 
2. On a lightly floured surface, roll the crust out into a 10 inch circle, about 1/4 inch thick. 
3. Carefully transfer the crust unto a lined baking sheet. (Alternatively, since the crust can be a bit soft and tricky to work with,  tape a sheet of parchment paper (the size of your baking sheet) unto your work surface. and roll out the dough onto the paper. Then, remove and discard the tape, and transfer the parchment paper together with the crust unto your baking sheet.)
3. Arrange the pineapple slices on the tart crust, leaving about a 2 inch border all around. Sprinkle the sugar mixture on top of the pineapple and dot with the cubed butter. Fold the border up over the edge of the pineapple filling, making sure to leave much of the fruit uncovered. Bake in a 375 degree oven for about 50 minutes until the crust is golden brown. Cool on a wire rack for 10 to 15 minutes before serving. 

Tuesday, July 13, 2010

Chicken and Shrimp Paella


After an intense month of joy and heartache, Spain has own the 2010 world cup. On that eventful Sunday, my husband and I planned our day around the event. Spain was our second choice after the US didn't make it into the final group of sixteen. Isn't that the magic of the game? That after the crushing loss from the US departure, all of our hopes were revived with Spain in the final. That two people with no real ties to that country (except my diluted Spanish heritage, and our love of spanish food, music, and culture) would find so much happiness in a single goal, to me, is part of the magic of the game. And not just us; among our freinds everyone was interested in the final match. One person even threatened to "unfriend" me on Facebook because of my exuberant status update after the win. Needless to say, she's a Netherlands fan, and of course was only joking... I think.

In honor of the event, I made this seafood and chicken paella. This is my basic go-to recipe for paella but this was the first time that I've made it in my new paella pan from Kitchen Window in Uptown Minneapolis. And what a difference it makes, especially in terms of a reduction in cooking time. And that chewy layer of rice at the bottom of the pan; worth every cent!

Chicken and Shrimp Paella
Serves 3 to 4

2 oz prosciutto
2 to 4 tbsp olive oil
2 boneless, skinless chicken breasts, cubed*
1/2 cup diced onion
2 cloves garlic, minced
1 cup diced bell pepper
1/2 tsp saffron threads, crushed
1 1/2 cup long grain white rice
2 1/2 to 3 1/2 cups chicken stock
1/2 cup marinated artichoke hearts
1/2 cup green peas
1 cup diced fresh tomatoes
8 to 10 raw shrimp, with tails on

1. In a large pot or paella pan over medium heat, add a couple tablespoons of olive oil. Cook the prosciutto until crispy. Remove and add the chicken. Cook for about 15 minutes until evenly browned. Remove and add the remaining two tablespoons of oil. Saute the onion, garlic, and peppers for another 8 to 10 minutes until they have browned on the edges.
2. Add the rice and saffron threads. Stir thoroughly until the rice becomes glossy and is coated nicely by the onion mixture. Pour 2 1/2 cups chicken broth over the rice and stir. It takes about another 20 minutes for the rice to cook. Stir occasionally and add more chicken broth or hot water (up to 1 cup more) if needed.
3. Once the rice has cooked, add the raw shrimp. Stir and allow shrimp to cook for another 3 or four minutes until pink throughout. Evenly layer the cooked chicken, tomatoes, peas, and crunchy prosciutto on the top before serving.

*I always like to season chicken for recipes like this, i.e. recipes where the chicken is just part of the main dish. It's a technique I've learnt from growing up in Trinidad. So here, I seasoned the chicken breasts with salt, pepper, one crushed garlic clove and the leaves of one sprig of thyme and a teaspoon of paprika.
Also, you would notice that I did not add salt to the recipe above and that is because the chicken broth already has a lot of sodium. Of course, if you find you need more salt, go right ahead and add to taste.

Saturday, May 8, 2010

Lamb Dumplings with Tomato Sauce


The idea of making dumplings is no longer daunting for me. Thanks to ready made wonton skins. I admit: I've never made dumpling dough from scratch before but it seems like a lot of work. Although I am a proponent of certain traditional culinary methods, I'd pass on this one. Homemade bread I can bake fresh every day, and I prefer to grind and brew my own coffee (my husband even roasts our own beans now), and make my own tart and pie shells, but the idea of making dumpling from scratch... not so much. Wonton skins just make things so simple. And they are so versatile too. Having them on hand opens up many possibilities. I specially like that they make a good substitute for mini quiche and mini tart shells.

While when we think of dumplings, the ingredients that usually come to mind are asian inspired, these are filled with an all spice-seasoned lamb and carrot mixture. So for the dipping sauce I am also offering something slightly different: a chunky tomato puree. And if you find that the edges of these dumplings do not have that traditional wavy appearance, that's because it doesn't. I can never get that folding technique right.

Lamb Dumplings
Makes 2 dozens

1/2 lb lamb, minced
1/2 cup finely grated carrot
1/4 cup cilantro, chopped
2 garlic cloves, minced
1 tsp all spice powder
1 tsp salt
24 wonton wrappers

1. Combine the first six ingredients; mix well. Cover with plastic wrap and refrigerate for at least thirty minutes.
2. To fill the dumplings: line a baking sheet with a tea cloth or paper towel. Place one tablespoon of filling mixture in the middle of one wonton wrapper. Dampen edges with water and bring the far half of the wonton skin up and over the filling towards you. Pinch edges slightly to form a seal. ( At this point, you can crimp or fold the edges to create the distinctive dumpling pleats, or not.) Place on the lined baking sheet and cover with another cloth or paper towel. Repeat with the remaining wonton skins.
3. Steam the dumplings in a bamboo or metal steamer for twenty minutes. (The water in the base of the steam should be slightly simmering, not boiling. )

Tomato Dipping Sauce

4 roma tomatoes
1 garlic clove, minces
2 tbsp chopped shallots
1/4 tsp all spice
1/4 tsp chili powder
2 tbsp olive oil
2 tbsp cilantro
1/4 cup grated parmesan


Add olive oil to a skillet over medium high heat. Saute shallots and garlic together with all spice until softened. Add the tomatoes and cook for another 5 minutes until soften. Remove from heat and pour into a food processor together with cilantro and grated parmesan. Puree and serve warm with dumplings.


Sunday, December 27, 2009

Garlic Pork


To be in Trinidad during the holidays is to experience the ultimate fusion of cultures. What started as a predominantly Spanish tradition has now morphed into an amalgam of influences left by the many nationalities that once governed or settled on the islands. And nowhere is it this more evident than in the food. (To my great delight.) There are over fifteen dishes that are specific to the season. The British left their sponge and fruit cakes, the Spanish left their pastelles (similar to arepas), the Africans introduced their paime (a sweetened disk of cornmeal, raisins, and coconut steamed in banana leaves), the Portuguese their garlic pork, just to name some of the more popular ones.

Trinidadians take the holiday season very seriously. We even have our own version of holiday music. Like celebrating christmas itself, this music originated with the Spanish. Called parang, it began as Spanish versions of carols. Today, parang music has diverged into soca parang and chutney parang, the former referring to holiday music with a soca /calypso rhythm and while the latter is the same only with an Indian rhythm. My paternal grandfather was a traditional parandero (parang singer.) And he was good too, having been part of a parang group during his time - the sixties and seventies. When I was growing up in rural Trinidad, these groups would go from house to house in the neighborhood in the same way carolers do here in the United States. The only difference was that they were invited in for food.

Like everywhere else in the world, it is a time for family and freinds. But unlike other places, it is taken to an extreme. Family can show up for days after December 25th, all the way into the first and second weeks of the new year, sometimes unannounced. So it is very important to have food ready. And lots of it. Of the foods mentioned above, fruit cakes and garlic pork can be made in advance, so many home cooks start preparations weeks, even months, before. But spoilage is not a serious issue: our fruit cakes are soaked in so much alcohol that not even the hardiest bacteria could survive. And garlic pork, once properly sealed in airtight containers, can be refrigerated for up to two weeks. (I usually don't go past four days, however.)

While Christmas is over with in the US, the Trinidadian girl in me still feels like celebrating...with food. Here is my version of garlic pork.


Garlic Pork
Serves 4 to 6

2 lbs boneless pork, cut into cubes
2 heads garlic, grated
2 tbsp red pepper flakes
4 sprigs fresh thyme
1 bay leaf
4 cups white wine vinegar
1/4 cup chopped cilantro (optional)


1. Combine all of the ingredients and place in an airtight container in the refrigerator for at least two days. Maximum four days.
2. When ready to cook, remove the meat from the marinade. Add to a large stock pot with just enough water to cover, and boil until the meat is cooked through about 10 minutes. Drain.
3. Add a couple tablespoons of vegetable oil to a hot skillet and cook the pork in batches until golden brown on all sides. * Sprinkle with cilantro and serve warm with chutney or in whole wheat rolls.

*Alternatively, the boiled pork can be cooked in the oven at 400 degrees F, for fifteen to twenty minutes until browned. (I prefer the skillet version, though.)


Tuesday, December 1, 2009

Homemade Hummus - a low fat recipe

Talk about easy. Making hummus can be summarized in three quick steps: 1) add ingredients to food processor, 2) puree, and 3) eat. But leave it to me to complicate things a little. I thought I'd at least try and lighten up this Middle Eastern staple. Which is not to say that I have anything against the traditional ingredients used in original recipes. The distinctive flavors of chick peas with creamy tahini and fresh parsley, served with warm pieces of pita bread, solicits day dreams of antiquated seaside villages, and brilliant, blue Mediterranean waters, permeated by the actual aromas of sesame, olive oil, and lemons.

Since my goal was to reduce calories, the first ingredient I manipulated was tahini. Tahini is simply toasted sesame seeds which have been ground into a paste. Sesame seeds are also used to make sesame oil so it follows that tahini would contain a good amount of fat. I decided to substitute it for greek yogurt. Low fat greek yogurt, in particular, because it contains just enough fat to lend a creamy texture to the dip but, at the same time, is not as high in calories as tahini. (One hundred and twenty calories per cup of low fat yogurt compared to eighty eight per tablespoon of tahini.)

Next came the lemon juice. I discovered Moroccan preserved lemons last spring and have been using it in most of my seafood dishes and stews, so I always keep some in my refrigerator. The preserving solution also comes in handy but not in a calorie-specific way. It simply imparts a strong, tangy flavor and can be used in most savory dishes that call for fresh lemon juice. But where can one find Moroccan preserved lemons, besides Morocco? They are not as elusive as the name might suggest. I know that Whole Foods carries it as do many imported food stores. But if you can't find them at all, go ahead and use the juice of fresh lemons - the fact that your hummus is fresh and homemade will eclipse any minor ingredient substitution.


Homemade Hummus
Makes approximately 2 cups

1 can chick peas
2 garlic cloves
1/4 plain greek yogurt*
2 tbsp preserved lemon juice **
1/4 cup chopped parsley
2 tbsp olive oil

1. Drain the chick peas from the can and add to a pot with just enough water to cover them. Boil for ten minutes. Drain and add to food processor with the garlic, yogurt, and lemon juice. Puree until smooth.
2. Fold in the parsley, and transfer to a serving bowl. Just before serving, drizzle with the olive oil and garnish with pickled peppers (optional.) Serve with pieces of pita bread or whole grain crackers.

* Here I used low fat greek yogurt for a lower calorie hummus but for the traditional version, simply use the same amount of tahini instead.

** If you can't find preserved lemon juice, use the juice of fresh lemons.

Sunday, November 8, 2009

Learning About Coffee on Hawaii's Big Island

My kitchen counter is scattered with one-pound bags of one hundred percent Kona coffee, jars of real Hawaiian honey, and packets of chocolate-covered macadamia nuts. In other words, my kitchen is a mess and I am too tired to do anything about it. But I have an excuse: jet lag. We spent the last twelve days exploring Hawaii's Big Island (the last of the four major islands I had yet to visit) starting with three days in Hilo, two days in Volcano Village and summing up the final seven days on the Kona side.( Yes, we enjoy the islands so much that we decided to do a second trip this year. ) This trip was supposed to be different from the others, and rightly so, since the big island itself is unlike the other islands. The youngest, the largest, home of the tallest mountain in the world (measured from its sea base), home of a flowing volcano, and home of the world's best coffee - hence the bags of beans on my counter.

The Kona coast is known for having the ideal combination of environmental factors for growing coffee. So clearly there would be numerous coffee plantations along this side of the island. Touring one of these plantations has become a part of the tourism industry. We decided to tour Greenwell Farms for a couple reasons: 1) it was recommended by Big Island Revealed (remember, this series is my holy grail for everything Hawaii), and 2) they are a family run business, started in the late 1800's and still functions today as a pesticide free production.

Fresh coffee beans removed from outer shell.

On the day we visited, we were immediately greeted by one of the tour guides and offered cups of freshly brewed coffee; not a bad way to start any tour. While the tour lasted a mere thirty minutes or so, we were able to follow the coffee bean from the tree to all the way to the drying process. I have a special fondness and respect for the agrarian lifestyle. In fact, my grandmother worked on a coffee plantation in Trinidad for many years. Even so, I never knew that ripe coffee beans, called coffee cherries, were actually very sweet with a gelatinous texture, somewhat similar to a grape. And that the bean itself is surrounded by three outer layers: the exocarp (the skin itself), the mesocarp (the soft, sweet layer beneath that) and the endocarp (the last, parchment-like layer covering the bean itself.) The ripe coffee cherries are gathered into a pulping mill where the first two layers are removed. Now, the product is called "wet parchment." Once the final layer is removed, the beans are then dried on large, flat beds with movable roof-like tops. Now called "dry parchment", the beans are then allowed to rest for up to thirty days to allow their natural moisture to evenly distribute which allows for uniform roasting. We weren't allowed into Greenwell's roasting facility but we did get to sample their various roasts, along with macadamia nuts and local honey.

Coffee beans are dried manually on large flat beds with movable roof tops.

After only thirty minutes in the sun, even with a hat and sunglasses, I will never again complain about handing over twenty plus dollars for a pound of good coffee. For even though Greenwell has adopted modern farming practices, every coffee cherry is hand picked! Yes, hand-picked by men and women in eighty degree heat. Added to that, the beans are not mechanically dried on those flat beds; it again takes human labor to spread them out into an even layer and to constantly re-mix and re-spread each batch to allow even drying. That's a lot of hard work! Greenwell's beans are only available for purchase at the plantation and on their website.

Branches of a coffee tree weighed down with green coffee cherries.

This tour was definitely one of the highlights of our trip but not the only one. Below are some photos from our hike across Kilauea Iki Crater, a two hour trek through rain forest, a volcanic crater, with views of the active side of this same volcano, and glimpses of endemic flora and fauna.

Made it out of the rain forest and about to trek across Kilauea Iki Crater.

There once was a road here.

In Thurston Lava Tube.

Saturday, October 17, 2009

Cooking for my father: a recipe for butternut squash curry


My father's visit, October 2009.

I'm a little late with posting because we had a visitor recently: my father. He was here for one very short, but lovely week. I don't see my family very often so, whenever it happens, I try to spend every minute that I can with them.

My father is the most emotionally collected person I know. He brings a sense of reason to every situation; nothing seems to faze him. And he always seems to be content with whatever he has and wherever he is at any given moment. Consequently, he is not the most adventurous type, preferring instead to keep his life simple and the way he has known it for years, in such ways as vacationing close to home, buying the same make of vehicle, and in his choice of clothing. It is the same with food. Trying to cook for him has always been a nervous endeavor on my part. My siblings and I think of him as a picky eater partly because he has always preferred the foods he grew up on. I think my mother and grandmother were the only people who got it right in his opinion. Or maybe he was just all too cautious about my sister's and my kitchen experiments. During my last trip to Trinidad, I remember preparing him a cup of tea the way he likes it: with sugar and milk (a legacy of the British) and yet, it wasn't good enough. And this was only tea, for crying out loud. Who gets tea wrong?

Needless to say, he took everyone by surprise with his recent interest in travel. Even more surprising was his changing attitude towards non-Caribbean food. His favorites are now Malaysian and Egyptian. Didn't see that coming. So, when he called to say that he would be visiting us this month, I was less nervous about cooking for him and more excited about having him try some of my new recipes and for him to understand and hopefully appreciate, my new approach to food. I had a couple recipes in mind - one I've made before (Maple Anise Braised Country Ribs) and a new one.

During the radio interview I had a couple weeks ago, Susan Berkson asked, "What would you cook with the vegetables available at the farmers' market this week?" I didn't hesitate for a second because I already had a plan for the season's most popular vegetable: squash. In particular, butternut squash - my favorite. Last year, I made Butternut Squash Creme Brulee practically every weekend for about two months. It has a smooth texture and is sweeter than most other squashes which worked well in that preparation. But this time, I was planning to make it into a curry, incorporating the flavors of onions, chili peppers and low fat coconut milk. More than that, however, I was planning to serve it to my father! Brave girl, that's me. I was thrilled that he enjoyed it and now that I know he is broadening his culinary horizons, I can't wait for his next visit to make some new recipes for him.


Butternut Squash Curry
Serves 4 to 5

1 butternut squash (peeled, seeded and cut into chunks)
3 tbsp olive oil
1 cup diced onion
4 cloves garlic, minced
3 tbsp curry powder*
1 1/2 cups low sodium vegetable broth
1 cup low fat coconut milk
4 -5 jalepenos, sliced (optional)
1/2 cup green onions, chopped

1. Place a large dutch oven or other deep pot over medium heat and add the olive oil, followed by onion, garlic, and half of the jalepenos. Cook for about five minutes until the vegetables soften. Stir often to prevent burning. Add the curry powder, stir to combine, and cook for an additional minute.
2. Add the chunks of butternut squash and turn to coat thoroughly with curry mixture. Add the vegetable broth and coconut milk, cover and cook for 20 to 30 minutes until the squash is soft but not mushy and the broth and coconut milk have made a thick sauce. Top with any leftover jalepenos and the green onions before serving.

*I use a curry powder blend common to the Caribbean, called Madras Curry. Other curry powders can also be used, such as the yellow curry blend sold in most spice or grocery stores.

Tuesday, September 16, 2008

Roasted Mushrooms with Shallot Chilli Oil

Clockwise from right: shiitaki, enoki, button, and oyster mushrooms

It all started a month ago. We had just sat down at one of our favorite (athentic) chinese restaurants and was in the middle of giving our order to the waitress. Hot and sour szechuan soup, ma po tofu, pea-tips in garlic sauce. "Oh, I'm sorry," she said to me in a hushed voice, "the pea-tips are not great today, wait until September when they are good and mature." Disappointment. Disappointed because those soft, leafy greens were the reason I cajoled my fiance to make the twenty minute trip to Richfield. 

On the drive home, we decided that in a month we would make a trip to the asian supermarket for some of those mature pea-tips. Taking the waitress' words to heart, last Sunday was the day we designated for the asian market. All month I had been looking forward to this day, which turned out to be a bleak and raining day. I was not fazed; that evening we were going to dine on crisp pea tips sauted with garlic and drizzled with a little  olive oil. 

So you can only imagine my disappointment at the sparse vegetable selection that awaited us. (Sparse is putting it subtly.) The vegetable shelves were practically bare, the pea-tips leaving much to be desired. It took me a few moments to contain my disappointment and make the most of the circumstances. We were already there, why not take this opportunity to stock up on some other asian ingredients such as sauces and our favorite roasted, brown rice tea. We eventually left with bottles of ponzu, various teas and  an assortment of mushrooms, the one vegetable that was fresh and plentiful that day.  


Roasted mushroom medley

6 oz enoki mushrooms
6 oz shiitake mushrooms
6 oz oyster mushrooms 
6 oz button mushrooms, slices
1/4 cup ponzu
2 - 3 tbsp chilli oil (depending on desired level of heat)
1 shallot, thinly sliced


1. With a damp paper towel or tea cloth, clean mushrooms lightly to remove any dirt. 
2. Toss with ponzu. Evenly spread the mushrooms onto a baking sheet and broil in the middle of the oven for 5 minutes. Remove from oven and set aside.
3. Meanwhile in a hot skillet over medium heat, (it is important to heat the skillet before adding the oil) add the chilli oil and shallots. Cook shallots for 1 minute, without stirring, just long enough to infuse the oil with its flavor. 
4. Pour hot oil and shallots over mushroom. Serve immediately.