Showing posts with label healthy. Show all posts

Saturday, January 19, 2019

Colorful Vegetable Trays - How I Sometimes Get My Toddler To Eat His Veggies


One of the most challenging things I do on a daily basis is try to encourage my toddler to eat vegetables. To give him credit, he does eat those spicy black bean quinoa burgers from Trader Joes (the ones that were voted one of the best veggie burgers on the market). Besides that, the only substantial sources of vegetable nutrition comes from any that I am able to discreetly sneak into foods, such as kale blended into a green smoothie, grated zucchini baked in a chocolate bread,  finely ground peppers and mushrooms incorporated into taco meat, and not forgetting fruit and vegetable pouches - those are heaven sent.

Like most toddlers, mine is attracted to colorful foods. And if he can get involved in its preparation, he will be more prone to  trying it at least once. To that end, I recruit him quite often to " help" me in the kitchen. One of the things he loves to do is spiralize vegetables, in spite  of his deep-seated vegetable aversion. (Of course, we use the spiralizer together and he is never without adult supervision whenever he is in the kitchen.) Much to my surprise, every vegetable that he has spiralized, he has tasted. So far, cucumber has been added to the list of foods he now eats. Carrots? Beets? Still off the list but Rome wasn't built in a day. 

It is a challenge trying to encourage healthy behaviors in toddlers. I think the best we can do is lead by example and continue to have healthy options for food available. I try to have a colorful vegetable platter (ideally one that he and I have prepared together)  on the table most evenings, as often as time, my patience and energy level would allow. Sometimes, my toddler would eat a few pieces - last night he ate two slices of cucumber and a slice of radish. Other times, he runs from the table screaming for three scopes of  ice cream. He likes to keep things interesting, as interesting as I like to keep my vegetable platters.  

Sunday, January 6, 2019

Cherry Coconut Overnight Oats


Overnight oats is one of those perfect breakfast foods. It is quick and easy to make, and full of good properties such as fiber and protein, that magical nutrient combo that can keep you satiated until lunch time...on most days! 

For me, its appeal has to do also with its versatility. Overnight oats can be made with any combination of dried or fresh fruit plus additional flavorings: blueberry and almond, cinnamon and raisin, cherry and vanilla. Possible flavor combinations are endless. When it comes to the liquid ingredient, you can use any type of milk, it all depends on your preference or dietary restriction.  

This combination of cherry and coconut is one that I am currently enjoying on mornings. Shredded coconut adds just the right amount of sweetness that I am looking for, as well as additional fiber. And the protein? That comes from the soy milk. This  is a delicious and healthy breakfast that certainly keeps me full all morning. 

Cherry Coconut Overnight Oats
Makes 2 servings 

1 cup old fashioned rolled oats
1/3 cup dried cherries 
1/3 cup sweetened shredded coconut 
1/4 cup coconut yogurt
1 cup soy milk 

1. Mix all of the ingredients together. Place in a sealed container and refrigerate over night. 
2. The following morning, remove oats from he refrigerator and stir to determine if it needs additional liquid to reach desired consistency. Pour into serving bowl, and top with additional coconut flakes and fresh cherries, if desired. 


Saturday, January 13, 2018

Chicken Satay


Peninsula is the popular Malaysian restaurant in Uptown, Minneapolis that we frequented when we lived in the area, in what seems like a lifetime ago (in actuality, it has  been just over seven years.) There were two appetizers we always made a pointed of ordering: their roti canai and their chicken satay. I believe, this was the first place I had ever tasted chicken satay and have been a fan ever since.

To make them at home, chicken satay skewers require a bit of preparation, ideally the day before, but they are one of my favorite appetizers, especially for a big party. It can also be an entree, served on top of fragrant rice.  The recipe, and that of the accompany peanut sauce, calls for a litany of ingredients which, at first glance, seems intimidating but, truly, it's just a matter of combining the spices and marinating the chicken before the grilling process. Many of the ingredients here can be found at your local grocery store but I usually have to make the trip to my nearest Asian food store for fresh lemon grass, fish sauce and tamarind chutney. And, be sure to marinate these over night to get the most out of all those fragrant herbs and spices. 

Chicken Satay 
Adapted from Rasa Malaysia 
Serves about 10 as an appetizer and about 6 as an entree

bamboo skewers 
1 small onion, roughly diced 
4 cloves garlic
1/2 tbsp ground turmeric 
2 tsp ground coriander 
1 tsp chilli powder, more or less or non at all depending on taste
2 tsp fish sauce 
2 tbsp brown sugar 
2  stalks of lemon grass, chopped
6 boneless, skin-less chicken breasts, cut into cubes

1. Soak the bamboo skewers in water for at least an hour. 
2. Blend the remaining ingredients, except the chicken, in a food processor until smooth. Pour over the cubed chicken and mix well. Cover with plastic wrap and refrigerate for at least two hours or overnight. 
3. Skewer three to four pieces of  chicken unto each bamboo skewer. Discard any remaining marinade.
4. Cook chicken skewers on a hot grill for 4-5 minutes on each side, making sure that the meat is throughly cooked. Serve with peanut sauce (see recipe below). 

Peanut Sauce
1 cup dry roster peanuts 
3 cloves garlic
1 small onion
1 inch of ginger
1 tbsp coriander 
1 cup water 
1 tbsp soy sauce 
1  1/2 tbsp sugar 
1/8 tsp salt 
1/4 cup oil
1 tbsp tamarind chutney 

1. Coarsely chop the peanuts in a food processor and set aside. 
2. Grind the garlic, onion, ginger, and coriander. 
3. Heat the oil and fry the spice mixture until grainy and aromatic, about 3 to 4 minutes, stirring to prevent burning.  
4. Add the chopped peanuts, water, soy sauce, salt, oil and tamarind chutney. Cook for an additional 4 to 5 minutes until smooth. 


Wednesday, September 12, 2012

Easy Tomato Basil Soup


Today, as I sliced through our CSA microshare of roma tomatoes, their sweet and intense aroma wafting to my nose, it dawned on me that this was the first time that I actually took notice of the aroma of a roma tomato. Conventional roma tomatoes - those sold at chain grocery stores - never smell this good, or even look this vibrant - brilliant, crimson red - for that matter. Don't you agree?

Conventional romas are usually sold under-ripe which explains why they rarely taste or look their best. I'm sure if you were to leave them on the counter for a few days or in a sealed brown paper bag for a day or two, they would develop the sweet flavor that comes naturally to those sold at farmers' markets across the country.

We've had a surplus of romas since they've been in our CSA delivery for the past three weeks. This turned out to be a good thing for making creamy tomato basil soup, without the cream. 


Easy Tomato Basil Soup
Serves 3 to 4

8 to 10 roma tomatoes
3 tbsp olive oil, plus 2 tbsp
3/4 tsp salt
1/2 tsp ground pepper
2 onions, sliced
2 garlic cloves, minced
1 jalapeno, sliced (optional)
4 to 5 cups low sodium chicken stock
1 cup fresh basil leaves


1. Slice the tomatoes in half and toss with the olive oil. Season with salt and pepper. Place cut side down and in a single layer on a baking sheet, and roast in a 400 degrees F oven for 20 to 25 minutes. 
2. Heat the remaining 2 tablespoons of olive oil in a large pot over medium heat. Cook the onions, garlic, and jalapeno (if using) until slightly browned. Add the roasted tomatoes (with all the juices from the pan), the chicken stock, and basil leaves. Stir and and bring to a slow simmer. Cover and cook for 15 minutes. 
3. Carefully transfer the soup to a blender and puree until smooth (or to your desired consistency). Return soup to the pot, and and return to a gentle simmer. Serve warm with garlic croutons. 

Friday, August 31, 2012

Cooking in Barcelona

At this point, we had been in Barcelona for only three days but taxis had become our primary means  of transportation. Barcelona's climate is oppressive in August.  An otherwise leisurely twenty minute walk is made unbearable by the heat and humidity, even at eleven o'clock in the morning.

Joining us this morning were two of our friends from Minneapolis who had been living and working in Barca for the past year, and who have somehow rapidly adapted to the heat. We boarded the taxi at the corner of Madrazzo and Valmis, an intersection marked by the a local hospital and relatively modern buildings. The cab driver was soon maneuvering through cobble-stoned streets, barely wide enough for his Spanish-made Astra. We slowly drove past ornate hardwood doors and brightly colored store fronts bordered by wrought-iron lamps, and flowers baskets hanging from windows and spilling over with brightly colored vines and blossoms.  We had come to this part of town for a lesson in Catalan cuisine. And I was ready to learn about and savor the favors of Spain!

Clams for the paella. 

Chef Alesandra getting the paella started. 

Espai Boisa is run by Claudia Schmilinsky and Pep Soler, a husband and wife team with a desire to teach locals and travelers alike about Spanish and Catalan cuisine.  From the prawns and clams for the paella, to the tomatoes and olive oil for the pan con tomate, and the red and white wines that Pep so generously refilled throughout the class -  all ingredients were fresh, organic, and sourced locally.

Catalonia, of which Barcelona is the capital, is the northeastern most region in Spain with a cuisine distinct from other regions. Claudia and Pep and their chef Alesandra prepared a menu of both Catalan and other regional dishes: spanish tortilla, bacon wrapped stuffed dates, pan con tomate, gazpacho, paella, and crema catalana.

 Preparing pan con tomate.

 The finished paella. 

 Crema catalana.

The class started with introductions, followed by a quick description of each dish by Alesandra. Our first appetizer, the spanish tortilla, is an egg dish made in a non-stick skillet and filled with potatoes and onions cooked confit-style. Certainly, not your ordinary breakfast eggs. The other appetizer was dates stuffed with almonds and wrapped in bacon before finally being roasted in the oven - a simple hor d'oeuvre which I took note to make at home at my next casual dinner party, served with a pitcher of homemade sangria perhaps. A third appetizer was pan con tomate, simply slices of fresh bread rubbed with fresh tomatoes and finished with sea salt and olive oil. Then there was gazpacho. Alexandra makes her gazapacho with tomatoes, onions, watermelon, lemon juice and olive oil. This, we later learnt, is a slight variation from the traditional gazapacho which includes day-old bread.  Our main dish was paella which is not Catalan, having originated in the Valencia region, but what cooking class in Spain would be complete without Spain's most popular dish? Dessert was crema catalana, a dish similar to creme brulee with a couple notable differences. Crema catalana is made with whole milk and the custard is finished on the stove-top; creme brulee is made with cream and the custard is finished in the oven.

While Alesandra relayed instructions, members of the class (on this day there were fourteen of us) began the chopping and dicing process, getting the ingredients ready for their respective dishes. We all  had different tasks: a couple people supervised the potatoes-confit for the spanish tortillas, some worked on the gazpacho but everyone got a chance to help with the paella. Seemingly, we all gravitated to the large paella pot in the center of the cooking station, a point that Alesandra took notice of and expounded on. Paella, she explained, is a dish that's meant to be shared and those restaurants that serve individual paellas deviate from the true meaning of the dish. I liked her narrative. I have a strong proclivity for tradition when it comes to food,  so I respected her efforts to incorporate her values in the class.

With Claudia and Pep. 

Two and a half hours passed quickly amidst the the chatter, the culinary education, and the good wine. Claudia and Pep were the most gracious hosts, having done a superb job of facilitating a warm, welcoming environment.  While fourteen people is a lot for one cooking class, I felt that it made for an interesting mix of backgrounds and conversation. In the end, we all had one thing in common: an appreciation of healthy, wholesome, and delicious food. So, if you ever make it to Barcelona, try and include a cooking class from Espai Boisa on your agenda. If I return, I'd do it again.

To view more photos, click here for our Facebook page.
For more information about Espai Boisa, click here.

Recipes:


Bacon Wrapped Dates
(8 ounce) package pitted dates 
4 ounces almonds
1 pound sliced bacon
Directions
Preheat the broiler. Slit dates. Place one almond inside each date. Wrap dates with bacon, using toothpicks to hold them together. Broil 10 minutes, or until bacon is evenly brown and crisp.


Traditional Gazpacho
Serves 4
100g slightly stale crusty white bread, soaked in cold water for 20 min. 
1kg very ripe tomatoes, diced 
1 ripe red pepper and 1 green pepper, deseeded and diced 
1 medium cucumber, peeled and diced
2 cloves of garlic, peeled and crushed 
150ml extra virgin olive oil 
2 tbsp sherry vinegar 
Salt, to taste
Lemon juice, to taste
Directions1. Mix the diced tomatoes, peppers and cucumber with the crushed garlic and olive oil in the bowl of a food processor or blender. Squeeze out the bread, tear it roughly into chunks, and add to the mixture. 2. Blend until smooth, then add the salt and vinegar to taste and stir well. 3. Pass the mixture through a fine sieve, then cover and refrigerate until well chilled. 4. Serve with garnishes of your choice: I liked diced black olives, hard- boiled egg and small pieces of cucumber and pepper; mint or parsley also works well, and many people add spring onion, cubes of Spanish ham and so on.

Crema Catalana or Catalan Cream
Crema Catalana or Catalan Cream is the Catalan name and version of the French dessert, crème brulée. In fact, many regions lay claim to the origin of the dessert. Wherever it originated, enjoy and let it dissolve in your mouth! It is a great dessert for Spring, since it is also called Crema de Sant Josep, or St. Joseph’s cream, traditionally prepared on March 19th, St. Joseph’s Day, the Spanish equivalent of Father’s Day in the USA.
Yield: 4 Servings 
Ingredients: 
1 cup sugar
4 egg yolks
1 tbsp cornstarch
1 stick cinnamon
grated rind of 1 lemon 
2 cups milk
Directions: This is a great dessert to make ahead of time, since it is very easy and requires 2-3 hours of refrigeration before serving. Make it the day before and leave it in the refrigerator until you are ready to serve. Then, heat the broiler, caramelize the sugar and serve! In a pot, beat together the egg yolks and 3/4 cup sugar until thoroughly blended and the mixture turns frothy. Add the cinnamon stick and grated lemon rind. Pour in the milk and cornstarch. Slowly heat the mixture, stirring constantly, just until thickened. Remove pot from heat immediately.
Tip: As soon as the mixture thickens and you feel resistance while stirring, remove the pot from the heat or the mixture may curdle or separate! The texture of the finished crema will be grainy instead of smooth and creamy as it should be. Remove the cinnamon stick and ladle the milk mixture into 4-6 ramekins (depending on size). Allow to cool, then refrigerate for at least 2-3 hours.Before serving, preheat the broiler. Remove ramekins with the crema catalana from refrigerator and sprinkle the rest of the sugar over each ramekin. When broiler is hot, place the ramekins under the broiler on the top shelf and allow the sugar to caramelize, turning gold and brown. This may take 10 minutes or so, depending on your broiler. Remove and serve immediately.If you'd like, you can serve the crema catalana chilled, but we think it has more flavor when served warm from the broiler.

Sunday, July 22, 2012

Coconut Kale


Kale is not a common vegetable in Trinidad, so my first experience with this green leafy vegetable was here in Minnesota. We had purchased a container of it at Whole Foods, where they combine it with cranberries, and cherry tomatoes. I was not impressed. Bitter and quite chewy. Nevertheless, I still incorporate kale in my diet for its nutritional content. And over the years, I've  learned to add new flavors to it to somewhat mask the bitterness. This recipe contains more than just coconut. Dried currants, onions, cilantro and chopped nuts; it makes a good side dish or stuffing for warm pita bread.

Sauteed Coconut Kale
Served about 3 

1 1/2 pounds kale, washed and chopped
2 tbsp vegetable oil
1 medium onion, sliced
1/3 cup shredded, unsweetened coconut
1/4 cup dried currants
2 tbsp chopped cilantro
salt, to taste
1/4 cup toasted pecans, optional 

1. Heat the oil in a large skillet over medium heat. Add the onion, and cook until softened and browned on the edges, about 4 to 5 minutes.
2. Add the coconut and currants to the onions, and cook for another minute or two, stirring to prevent burning. Add all of the chopped kale and cook until it wilts down slightly. Remove from the heat, and stir in the chopped cilantro and season with salt. Serve topped with extra shredded coconut and chopped pecans. 


Friday, June 29, 2012

Risotto with Caramelized Beets


To me,  a simple risotto is the perfect, most savory and creamy conveyor for everything that's fresh and in season. Fresh peas, asparagus, mushrooms and, this month, beets. This risotto starts with a bit of shallots and ends with a handful of parmesan and fresh basil; enough but not too much, so that you really get to enjoy the flavor of the caramelized beets.

Risotto with Caramelized Beets
Serves 2 to 3

2 shallots, minced
2 tbsp olive oil
1 1/2 cups arborio rice
1/2 cup white wine
4 to 5 cups low sodium chicken broth, warm
1/2 cup grated parmesan
10 fresh basil leaves, julienned
2 cups caramelized beets (click here for recipe)*

1. Heat the olive oil in a large pot over medium heat. Add the shallots, and cook until slightly browned. Add the rice, and  toast for two minutes, stirring well.
2. Pour the wine to the rice, and stir until almost all of  the liquid has evaporated. Add one cup of chicken broth, stirring until the rice has absorbed the liquid. Add the remaining stock, half cup at a time, stirring until all the liquid has evaporated after each addition. Stir in the parmesan and the basil. Serve the risotto topped with caramelized beets and extra fresh basil.

*The recipe for caramelized beets contains sugar. It is suggested to reduce the amount of sugar by half if using the beets in this risotto recipe.

Sunday, July 4, 2010

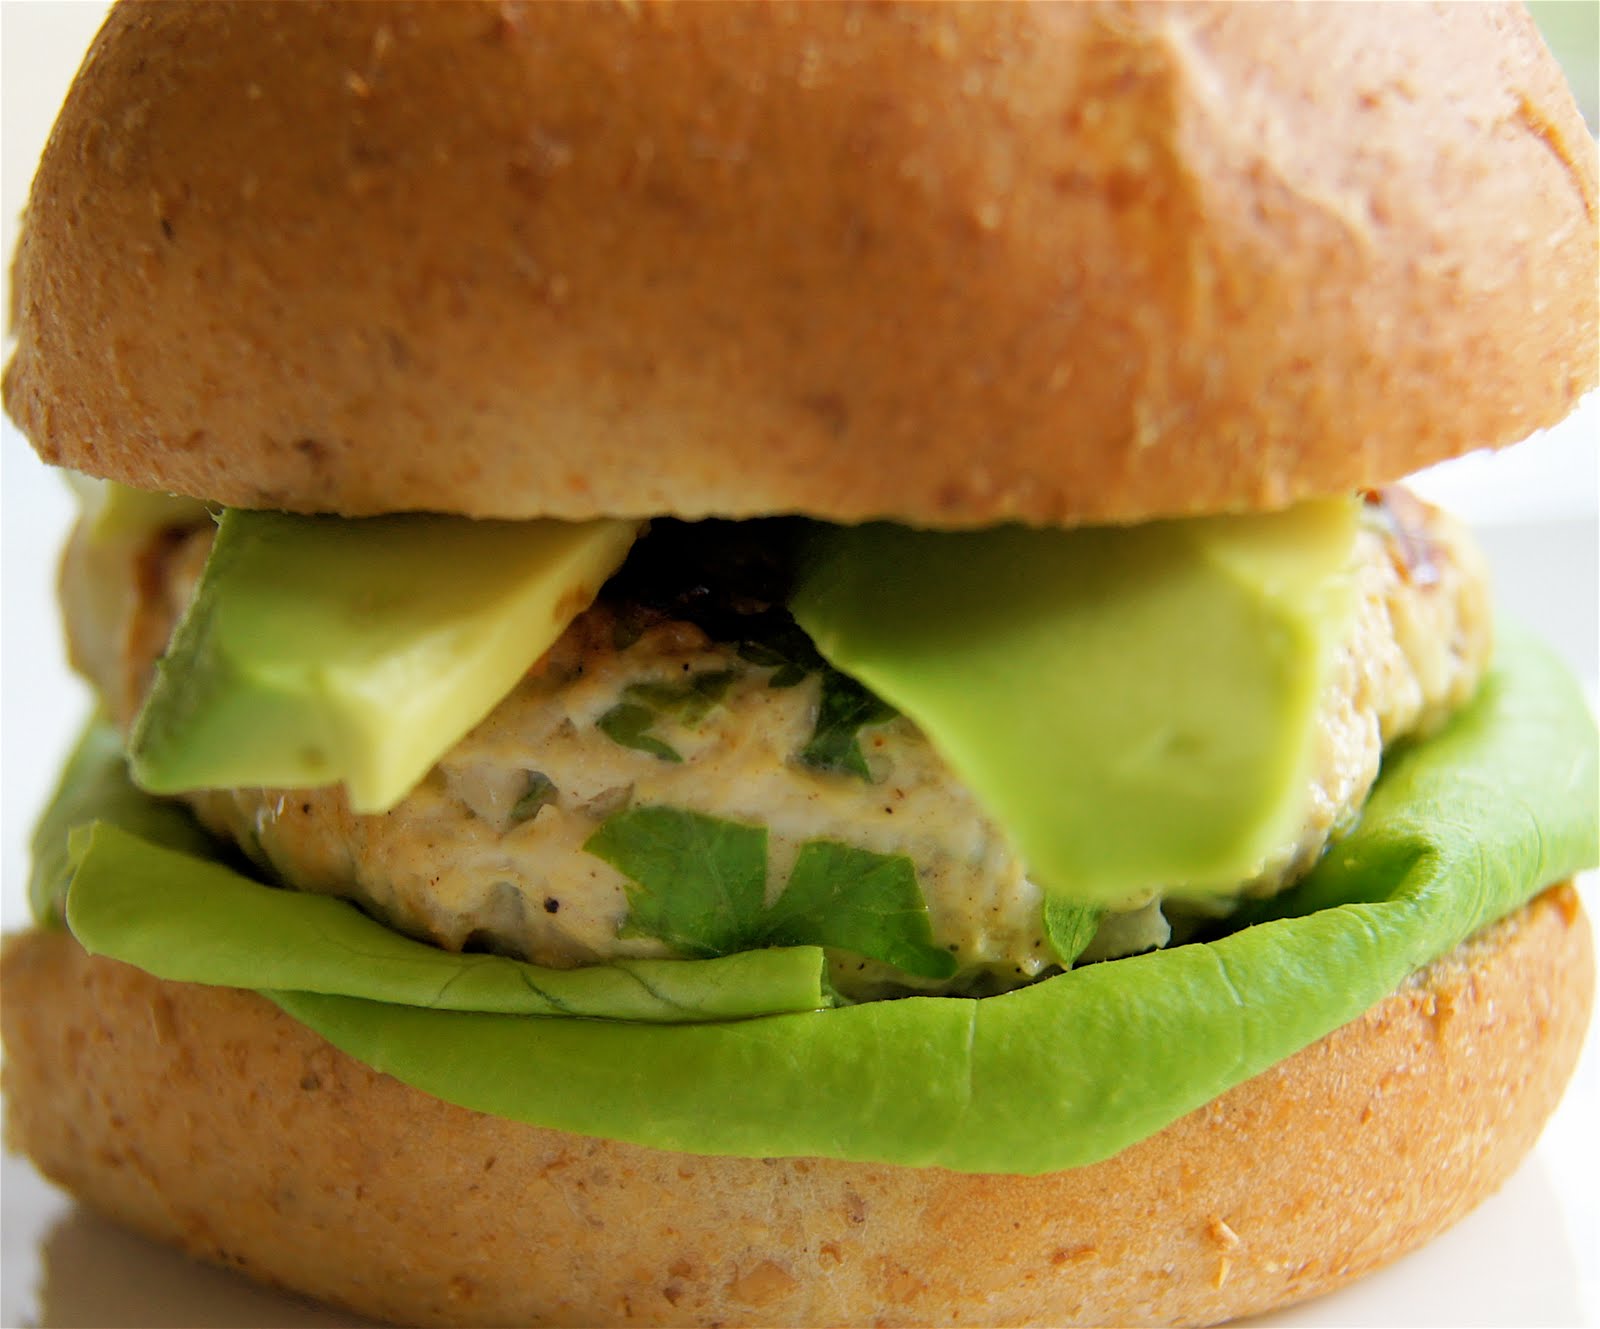
Turkey Burgers with Parsley and Fontina. Happy 4th!


Turkey breast is probably one of the healthiest meats available, with about 1 gram of fat per serving (33 grams.) Compared to regular hamburger meat which has about 7 grams of fat per serving and you see why I prefer to use turkey meat more often. Due to its lack of fat, turkey understandably dries out quickly during cooking. But I think the key to getting around this, especially for turkey burgers, is to use very high heat and to cook the patties for not more than four minutes on either side. I have also added chicken broth concentrate and fontina cheese to this recipe for extra moisture and "gooey-ness."

Happy 4th of July!


Turkey Burgers with Parsley and Fontina Cheese
Makes about eight 1" thick x 3 1/2 "diameter patties

1 lb ground turkey breast
1/2 cup chopped parsley
1/4 cup minced onion
2 large garlic cloves, grated or minced finely
2 tbsp yellow mustard
1/2 to 3/4 cup grated fontina cheese
3 tbsp chicken broth concentrate
1 tsp ground black pepper
1 tsp salt


1. Combine all of the ingredients together. Mix well to fully incorporate - you might have to use your fingers for this.
2. Shape meat into patties about one inch thick and three and a half inch in diameter. Heat skillet over medium high heat and grease well with vegetable oil. Cook each patty for four minutes on one side and three to four minutes on the other side, until the center is no longer pick. Serve on whole wheat buns with lettuce and avocado.


Friday, July 2, 2010

Fresh Strawberry Tart with Port Glaze


Last Wednesday, after a lazy morning of coffee, exercise, and brunch, we drove to the town of Delano (about fifty miles west of Minneapolis.) The quest: strawberries-picking at Apple Jack Orchards. Now, I've never been berry-picking before, but I expected fun to be had. Wide open spaces, fresh air, sweet fruit,and the satisfaction of comes with an awareness of the natural environment.

Not entirely the case. I would suggest embarking on this endeavor in the early morning or late afternoon. Not at midday when the sun is at its hottest. I always get asked, "But you are from the Caribbean, don't you like being in the sun? " Sure I do but physical activity in ninety degree heat can make even the most avid of sun worshippers a bit miserable. And, after all of that, a bee got caught in my hair and as I tried to free it, the little punk - I mean the cute, fuzzy, sweet-honey-producing bee - stung me! (Another suggestion, if you have long hair, tie in a pony tail or braid before strawberry picking.) Luckily, I'm not allergic to bee stings but never again will I complain about strawberry's high price. Locally grown strawberries are worth every cent.

All in all, the day wasn't a total disappointment . Even though it was the end of the season and most of the fruit were already gone by the time we got there, we (and by we, I mean mostly my husband) still managed to gather about three pounds. More than enough for this scrumptious tart.

My recipe is an adaptation of one I saved from a 2009 issue of Gourmet magazine; changing only a couple things. I added whole wheat pastry flour and cinnamon to the crust, and I tossed the berries with fresh mint for the filing, just to add another dimension of flavor and freshness.

Freshly picked, from the farmers market, or store bought, do try and get some local strawberries before the season is completely over. And if you do decide to drive to Apple Jack's Orchard, try their strawberry tart. Theirs is freshly made, and very good too!


Fresh Strawberry Tart with Port Glaze
(Adapted from Gourmet)
Serves 8

FOR TART SHELL
1/2 cup whole wheat pastry flour
3/4 cup all purpose flour
2 tsp ground cinnamon
3 tbsp brown sugar
1/4 tsp salt
7 tbsp unsalted butter, cut into 1/2-inch pieces
1 egg yolk
1/2 tsp vanilla extract
zest of 1 lemon
3 tbsp cold water

FOR FILLING
1 1/2 lb strawberries (trimmed)
1/3 cup brown sugar
1/2 cup port
1 cup mascarpone
1 cup fat free cream cheese (softened at room temperature)
1/3 cup confectioners sugar
2 tsp lemon juice
zest of 1 lemon
1 tsp pure vanilla extract
about 10 mint leaves

TO MAKE TART SHELL
1. Combine pastry and all purpose flours, salt, and butter in a bowl using your fingers, pastry blender, or food processor until mixture resembles coarse meal with some lumpy pea-sized butter bits.
2. Beat together yolk, vanilla, lemon zest, and water, then drizzle over flour mixture and stir until mixture comes together. Gently knead dough on a lightly floured surface until a dough forms. Press into a 5-inch disk.
3. Place dough disk in center of tart pan and cover with plastic wrap. Using your fingers or the bottom of a measuring cup, spread the dough to evenly cover the bottom and sides of pan. Prick bottom of shell with a fork and freeze until firm, about 10 minutes.
4. Pre-heat to 375 degrees F, with rack in the middle. Line tart shell with foil and pie weights and bake until sides are pale golden about, 20 minutes. Remove foil and pie weights and continue to bake until deep golden all over, another 15 to 20 minutes. Cool in pan, about 45 minutes.

TO MAKE PIE FILLING (while tart shell cools):
1. Stir together strawberries and brown sugar in bowl and let stand about 30 minutes, stirring occasionally. Strain liquid into a saucepan, reserving berries. Add port to liquid in pan and boil until slightly thickened and reduced by half, about 10 to 15 minutes. Transfer to a small bowl to cool slightly.
3. Tear the mint leaves into thin strip and toss in reserved berries.
2. While port glaze is cooling, blend together mascarpone, cream cheese, confectioners sugar, lemon juice, zest, and vanilla until thoroughly incorporated.

To Assemble Tart:
Spread mascarpone-cream cheese mixture evenly in cooled tart shell. Top with strawberries, and drizzle with port glaze.

Tuesday, May 19, 2009

Zucchini Flatbread and Tag: a game of getting to know more about our favorite bloggers.

A while back, I received the following fun exercise from Gera at Sweet Foods. The purpose: getting to know more about our favorite food bloggers. Now, it's my turn. Following Gera's example, I have attached some photos, some random ones chosen from a few of my trips.

First, though, here is my newest flatbread recipe: zucchini, almonds and mozzarella. Initially, I intended to make a simple zucchini flatbread but realized that I had a handful of slivered almonds left and not wanting them to go to waste ( nuts in general last a a good two or three months in the pantry, even longer in the freezer, before turning rancid) I added them to the mix. And not a bad idea either.


Zucchini Almond Flatbread
Serves four

1/2 cup whole wheat flour
1/2 cup all purpose flour
2 tsp active dry yeast
1 tbsp sugar
1/2 cup warm water
1/4 tsp salt
2 zucchini, sliced
2 cloved garlic, minced
2 tbsp olive oil
1/2 cup shredded mozzarella
1/4 cup toasted, slivered almonds


1. To make the dough: In a mixing bowl, add the water to the yeast and sugar, set aside until foamy, about 10 to 15 minutes. Add the flours and salt and mix into a ball. Remove to a flat, floured working surface and knead until soft and elastic about four to five minutes. Set in the mixing bowl that has been oiled. Cover and let rise for about an hour.
2. In a skillet set over medium heat, add the zucchini, garlic and oil. Cook until zucchini softens about three to four minutes. (It is not necessary to thoroughly cook the zucchini here because it will finish cooking in the oven.)
3. Roll the dough unto a well greased baking sheet to about one eighth of an inch thick. Evenly layer the zucchini and mozzarella. Finally, sprinkle the almonds. Bake at 450 degrees for ten to twelve minutes. Serve while still warm.

Now, on to the questionnaire.

Diamonds or pearls?
Not crazy about either.

What is the last film you saw?
Dark Knight

Your favorite series?
I'm a LOST junkie! It's the first series I actually followed from season one and I'm still hooked. Also watch Law and Order, CSI and anything interesting on Discovery and National Geographic.

What kind of breakfast do you have usually?
It depends on whether I'm eating alone or with my husband. Alone: some sort of cereal. With my husband: pancakes and omelette, or a traditional Trinidadian breakfast.

Lighthouse, Kauai.

Second given name?
Pearl. Yes, Pearl. When I was born, being her first granddaughter, my grandmother thought I was her little gem, hence "Pearl. " I'm just grateful Diamond or Gold didn't come to her mind.

Which kind of food can't you stand?
Processed food

Favorite name (at the moment)?
Don't have one.

Which car do you drive?
Acura.

Which trait or character don't you like?
Arrogance.

Star fish at Aquarium in Minneapolis.

Favorite clothes?
Badgley Mischka, Cache, Banana Republic, BCBG, Adidas.

If you could take the aeroplane to go somewhere, where would you go?
Tough one...Hawaii or Tahiti.

Sea horse at Aquarium.

Where would you want to live when you are retired?
Hawaii. I could seriously spend my days snorkeling, hiking the Na Pali cliffs, and eating fresh seafood.

Which birthday do you remember the most?
My last: my father and youngest sister had visited; I hadn't seen them in more than three years.

Your birthday?
October 10.

Shamu! San Diego.

If you were a color, which one would you be?
Red

Chocolate or vanilla?
Chocolate.

Coffee or tea?
Coffee! I started drinking coffee in college to stay up to study. Now, it seems I cannot start my day without a cup. Nothing fancy, just regular coffee; I grind my own beans though. I do have tea on most evenings.


Feeding the animals, Wild Animal Park, San Diego.

The last person you had on the phone?
My sister Nancy in Toronto. We speak to each other almost everyday.

Sweet or savory?
Sweet! My sweet tooth is going to be the end of me.

The day of the week you prefer?
Wednesday night because LOST is on!

Now, let's find out more about:
Sarah at Broken Yolks
Zerrin at Give Recipe

Friday, May 15, 2009

Balsamic Syrup for Fresh Fruit

Strawberries with balsamic syrup

When I was seventeen, I lived and worked in Toronto for five months. It was a period of time right after high school when I hadn't yet decided if I wanted to remain in Trinidad or move abroad for college. So, I went to Canada. ( Supposedly the next best logical step considering I had many relatives there who would keep me in line, or so my parents hoped .) 

After a month of sightseeing and catching up with relatives, it was time to get a part time job. That way, if I  decided to go to college there, I would already have an idea of how the city works.  My job: quasi sales girl for a small company that sold Indian spices, sauces, and chutneys. The owner travelled around the country to trade shows promoting and selling her products; I started working with her at the Convention Center in downtown Toronto. 

So, there I was, in one of the most vibrant cities in the world, with the best options for food and the one thing that I gravitated towards was...chocolate covered bananas. A few yards  down the aisle from our booth was another booth that sold all sorts of chocolate covered fruit, from bananas to pineapple to peaches. Every day after lunch I would buy some sort of chocolate covered confection. Small wonder I gained close to twenty pounds during those five months. 

Now, whenever I feel for a chocolate banana, I make this balsamic syrup that substitutes well for the chocolate and also goes great with almost any fresh fruit. That is not to say I  don't have the real stuff once in a while. :o)

Bananas with balsamic syrup and toasted  almonds


Balsamic Syrup

1/2 cup balsamic vinegar
1/4 cup maple syrup
1/2 tsp vanilla extract
fresh fruit (strawberries, bananas, peaches, etc)


Add the balsamic vinegar and maple syrup to a heavy sauce pan set over medium heat. Cook for 7 to 8 minutes until thick and bubbly.  Stir in the vanilla and serve immediately over fresh fruit or ice cream. 

Saturday, May 9, 2009

Sauteed Spinach with Whole Garlic and Raisins


I'm excited to be staying in tonight. You see, for the past two weeks we had been eating out every night. As much I enjoy the Minneapolis restaurant scene and eating out in general- especially now that it's almost summer and outdoor dining is the rave- the comfort of my apartment and my little kitchen is more appealing right now. On the menu tonight: sauteed spinach with whole garlic and raisins. Not very alluring, I know, but very simple and delicious. Just what I want after a slew of large and involved meals. 


Sauteed Spinach with Whole Garlic and Raisins
Serves two to three

5 cups fresh spinach, washed and drained 
6 garlic cloves
1/4 cup dark raisins
salt to taste
grated parmesan 

1. In a skillet set over medium high heat, add two tablespoons vegetable oil. Add the garlic and cook for three to four minutes, until they turn lightly brown.
2.  Add the raisins, cook for another minute or so until they plump up. Now,  add the spinach. Cook until they wilt, season with enough salt to taste, and serve with grated parmesan on top. 

Tuesday, April 28, 2009

Asparagus Salad with Gorgonzola Basil Pesto


I am back from five beautiful days in Florida. We were there for a wedding but decided to stay a couple extra days to soak up some sun and beach time. Unfortunately, the ocean temperature was a bit too cold to go in, at least it was for me. Luckily I had brought my kindle, and was  just as content sitting on the beach and catching up on my reading.

One of the great things about returning to Minnesota at this time is that you really get to see the seasons change. When we left, everything was still brown and grey but in a matter of five days, trees are filled with small green leaves, lawns are already in all their glory, and Minnesotans are coming out of the winter rut. 

There are also seasonal changes  in the groceries. At the moment, asparagus are at their peak so I took the opportunity to snatch a fresh bunch. I do not remember where but I read that, when choosing them, you should look for thicker spears because they have a juicier interior and are sweeter. Previously, there was only one way in which I prepared asparagus: steamed for two to three minutes, then seasoned with salt and pepper and drizzled with olive oil. To be honest, I am a little tired of that. So, today, I'm sharing my newest asparagus recipe. It does start by steaming but by adding a few extra ingredients a lowly side dish is transformed into a filling lunch or dinner salad.


Asparagus Salad with Gorgonzola Basil Pesto
Serves 2

1 lb asparagus
2 eggs
3 tbsp olive oil
2 oz gorgonzola
5 or 6 large basil leaves 
1 small avocado
candied pecans
salt pepper
french bread, optional


1. To prepare pesto, puree gorgonzola, olive oil and basil leaves in food processor until relatively smooth. Set aside until ready to use.
2. Steam your asparagus for two minutes, or if you prefer, get four cups of water boiling, add asparagus and boil for a minute or two. Remove the steamed or boiled spears to an ice bath. 
3. Meanwhile, fry eggs in hot skillet. Season with salt. Alternatively boiled eggs can be substituted here. 
4. Plate the salad by layering half of the asparagus spears, an egg, drizzle on pesto and garnish with half of the sliced avocado and candied or plain pecans. Repeat for the next salad. Serve with a slice of french bread. 
*Remember, this recipe serves two but it can be easily doubled or tripled. 

Friday, April 10, 2009

Baked Red Snapper with Preserved Lemon


Only recently did I start cooking with preserved lemons. How did I ever do without it! Actually, it was my husband who picked it up on our last grocery trip. Trust him to find the most unusual foods in the city. Once, before this, he had brought home chocolate covered edamame. Chocolate covered edamame!  It doesn't sound right, does it? My initial hesitation gave way to delight and gratitude as we  now have added something different and enticing to our pantry. 

Preserved lemons are common in Middle Eastern and Moroccan dishes.  When I found out that it is used  as commonly, and with the same frequency, as we in the west use standard flavorings such as garlic onions, and celery, I shamelessly have been cooking with it almost every day. It has a strong flavor so a little goes a long way. For example, I would recommend one third of a lemon to flavor enough bean stew for two people. 

Nothing pairs better with fish than citrus. Sometimes, just a couple tablespoons of lemon juice and salt and  pepper are all that's needed. Since this was going to be part of our Good Friday dinner, I thought I 'd  add a few extra, albeit simple, ingredients. Namely garlic and extra virgin olive oil. However, it was the preserved lemons that made this dish, bringing all the flavors together. Wisely, I have learnt to trust my husband's taste; his finds usually become permanent ingredients in our kitchen. 


Baked Red Snapper with Preserved Lemon
Serves two to three

1 red snapper fillet, about 1 lb
1 preserved lemon, sliced thinly
1 tbsp of the lemon brine
1 tbsp olive oil
1 clove garlic

1. Set the oven to 450 degrees F. 
2. Arrange the fillet skin side down on a well greased baking dish. 
3. Grate the garlic into a mixing bowl, add brine liquid and olive oil. Whisk; it will thicken and emulsify almost immediately. Brush most of this emulsion over the entire fish, reserving about a teaspoon. Arrange the lemon slices on top of the fish. Cover the baking dish with aluminum foil, sealing the edges tightly. Bake for 10 to 12 minutes until cooked through. Remove the foil, brush on the remaining lemon-olive oil dressing and return to the oven, uncovered. This time turn on the broiler and cook for another three or four minutes until edges turn brown. Serve immediately. 

Note: Preserved lemons can be found at Whole Food stores, and at other specialty food stores. If you want to make your own, there is a simple recipe over at Simply Recipes. Of course, this recipe is just as good with fresh lemons and lemon juice. 

Monday, February 9, 2009

Pomegranate Series Part 1: Poached Pears

It has been almost four years since I have modified my eating habits and the way I cook. My belief is that healthy food does not have to be boring or taste bad. And a healthy lifestyle does not mean absolute restrictions. I allow myself to indulge sometimes, sometimes maybe too much. Nonetheless, I have tried to reflect these beliefs here. I was humbled that the people at POM Wonderful, specifically Diana, recognized my efforts and offered to send me a case of their one hundred percent pomegranate juice to help with this endeavor. Now, let me tell you, pomegranates are rock stars in my kitchen so you could imagine how thrilled I was to receive this gift. I could not wait to begin cooking with it. This is part one of a series of dishes made with pure pomegranates (the juice and fruit forms.) I will try my best to present them consecutively but don't hold me to that.

Pomegranate juice can be used for more than the occasional cocktail. The health benefits are also spectacular. A slew of clinical studies has been conducted on the medicinal properties of this juice with positive results in the areas of cardiovascular health, prostate health, erectile function, and antioxidant potency.

Antioxidants are molecules found in our bodies and in food that slow the process of cellular oxidation. Basically, when cells use oxygen , they release highly reactive atoms or molecules called free radicals. Some free radicals are important in biology but there are others whose side reactions can be detrimental to our health. For example, free radicals are thought to function in some cancers, and diseases such as atherosclerosis and Parkinson's disease.

Antioxidants function to neutralize some of these harmful free radicals. While there are natural antioxidants in our bodies, many come from the types of foods we eat. Green tea, red wine, grape juice all contain some form of antioxidants. However, pomegranates contain higher concentrations than any of those. If that alone is not a reason to indulge in this fruit, I don't know what is.

For more information on the many health benefits of pomegranates, click here.

Pomegranate Poached Pears
Serves 4

4 bosc pears
2 cups 100 % pomegranate juice
1/4 cup sugar
2 whole star anise
1 piece of cinnamon stick (about 3")
1/2 cup sherry

1. Peel pears, being careful to retain the stem.
2. In a large pot over medium heat, combine the remaining ingredients and bring to a boil. Reduce heat to medium low and add the pears. Cook for 20 to 30 minutes, turning occasionally. Cook until the pears are tender, not soft and mushy.
3. Remove pears, cinnamon stick and star anise from the liquid. (Refrigerate pears in an air tight container until ready to serve.) Increase heat to medium high and allow to cook until the liquid has thickened to a syrupy consistency, being careful not to burn.
4. To serve, arrange a single pear and a scoop of mascarpone cheese (optional) on a serving plate, and drizzle with two tablespoons of syrup. Alternatively, pears can be served on a mixed greens salad with goat cheese and pomegranate seeds as pictured below.

Sunday, January 25, 2009

Chinese Bean Soup (with Sichuan Peppercorns)


My knowledge of authentic Chinese cuisine is limited but that does not prevent me from experimenting with various Chinese ingredients. One of my favorites is sichuan peppercorns. I still remember my first sichuan meal: more spicy than I had expected but what a meal! Spicy beef short ribs, chicken with green beans, and bean sprouts in a spicy broth. Since that delightful induction, sichuan cuisine is now high up on my list of ethnic indulgences.

The two main elements of sichuan cuisine are chili peppers and peppercorns. Despite its name, the sichuan peppercorn itself is not spicy but imparts a tingling, numbing sensation on the lips and tongue. With quite a unique aroma and taste, these tiny pods have an overtone I can only describe as similar to the aroma of lime leaves.

If used in excess, the taste can be overpowering, especially in a mild bean soup such as this. When I first made this recipe, I added a teaspoon to the beans while they softened and a teaspoon to the mushrooms. Instead of a bean soup, it tuned out to be a peppercorn soup, with a taste that was almost medicinal. Ultimately, a single teaspoon was just enough to impart the desired level of sichuan flavor .


Chinese Bean Soup
Serves two to three

1/2 cup black eyed beans
1/2 pint cremini mushrooms, sliced
1 tsp black szechuan peppercorns
2 cloves garlic, minced
1 tsp grated fresh ginger
2 tbsp chilli oil
3 cups low sodium vegetable broth
1 egg
1 green chili, chopped (more or less; optional)

1. Wash and boil black eyed beans in two cups of water until fork tender. I prefer using the pressure cooker for this as it softens the peas in about 10 minutes, as opposed to traditional boiling which can take up to half an hour. Drain and set aside.
2. Heat a stock or other deep pot over medium heat. Toss mushrooms with garlic and oil. Saute with peppercorns for five minutes. Stir in vegetable broth and cooked beans. Cover, reduce heat slightly and simmer for 12 to 15 minutes.
3. Whisk egg separately, pour into soup, quickly stir to distribute and remove soup from heat.
4. Serve immediately with small pieces of chopped fresh green chilli.

Friday, January 23, 2009

Green Pea Croquettes with Chevre


In the spirit of change, we decided to become vegetarian. No red meat, no poultry but maybe seafood. This was more of a health related decision than anything else. I am not sure why we had not done this before. After all, we typically ate meat once a week (except during the holidays when, I admit, it gets a little out of control) and whenever we dined out. Do I think we will miss meat? Do I think it will be a difficult change? On the contrary, I accept this as a interesting culinary challenge. Another reason to be creative in the kitchen.

After the first two weeks as an official vegetarian, it became obvious that, just as was suspected, this was not going to be very difficult. First, we were doing it together. That way, we can keep each other in check, and offer support and a gentle reminder when the other (usually me) behaves like an omnivore. Second, vegetarian options are endless and adding just a few key ingredients can turn a boring or over-done dish into an exciting new dinner staple. Like these croquettes.

Croquettes are typically cylindrical or circular disks of food, breaded and deep fried. While mashed potatoes and meat are typically the base, other ingredients can be substituted. And while deep frying is rarely undertaken in my home, I have found that the same crunchiness is achieved by searing in a little oil on high heat. Here, green peas are the base and soft goat cheese adds a striking flavor and contrast to the crunchy exterior. If you like crab cakes, I think you will like these little green patties. This recipes makes four to five large cakes or about eight appetizer-sized ones.

Green Pea Croquettes with Chevre
Serves 3 to 4

1 1/2 cups frozen or fresh green peas
1/2 medium onion, chopped
2 garlic cloves, minced
1 tbsp vegetable oil
2 tbsp part skimmed ricotta cheese
2 tbsp plain goat cheese plus more for serving
1 egg
1/2 tsp paprika
1/2 tsp cayenne pepper
1/2 tsp salt
1/4 cup chopped parsley
2/3 plain bread crumbs

1. Bring frozen peas to a boil in two cups of water for three minutes, drain and set aside.
2. Add one tablespoon vegetable oil to skillet over medium heat. Saute onion and garlic until soft, about three minutes, and add peas. Cook for another two minutes. Remove from heat, cool slightly, then puree in food processor or blender. Set aside.
3. In a large mixing bowl whisk together ricotta, chevre, egg, paprika, cayenne pepper, and salt. Combine well. Add pureed pea and onion mixture, parsley, and half of the breadcrumbs.
4. Set skillet over medium high heat and add about a quarter cup of vegetable oil. While oil heats, form pea mixture into 1 inch thick disks. Coat each side with reserved bread crumbs. Once oil has heated, add two or three patties at a time and cook for three minutes on each side.
Remove to paper towels to absorb excess oil. Serve with a wedge of chevre.

Monday, January 5, 2009

Beginning the year on a healthy note: with a fish soup

Standing on the corner of Canal and Baxter Streets in Chinatown, arguably New York's most famous ethnic enclave, I was taken back to my senior sociology class. In particular the section on how immigrants assimilate to life in the United States. New immigrants arrive here literally everyday with some never even bothering to learn English. Not because they chose not to but because the dynamics of the city's many ethnic enclaves make it easy to get by with just a basic knowledge of the language.

New York, as many other metropolises, would not be the attraction it is today if it were not for this influx of cultures. The mix of people, the music, the food, the ideologies all play a part in the attraction of the big apple. Imagining the city any other way is impossible. The constant influx of new immigrants, recently from Latin America and Asia in particular, has had an exceptional influence on the city's culinary sector. The restaurant scene alone is analogous to a mini world tour.

Last November, I chose to spend the Thanksgiving holiday in Queens; an easy decision not only because I get to spend time with relatives but it was also persimmon season! From August to about December, sidewalk fruit stands seem to glow with the bright orange of persimmons. Two varieties in particular, the fuyu and the hachiya. Me, I'm partial to the larger hachiya variety even though one must wait at least a week, sometimes more, for it to fully ripen. Otherwise, biting into an unripe hachiya is akin to eating a very green banana. Not a pleasant experience. The unpalatable aftertaste and sensation are due to the very high tannin content, especially the hachiya variety, which is only removed once the fruit is ripened. How can you tell when it is ripe? Simple. Ripe persimmons should be soft throughout while unripe ones are much firmer. Fuyu persimmons on the other hand are commonly classified as non astringent and are mostly ready to be eaten right from the vendor.

Food certainly is one reason I travel to New York. This visit was extra special. Oysters are particularly good this time of year and, true to form, my host had the freshest mini oyster bar awaiting us in the kitchen. He also shared this recipe with me; a common soup in Trinidad and Tobago's cuisine. As I have mentioned in previous posts, many of the country's cooks have their own variation of the national dishes. My mother and aunts all made this soup but each added their own special ingredient. I chose to post this version because of it relative simplicity. What better way to supplement our new year's resolutions regarding healthy eating than with a bowl of delicious, low fat Caribbean inspired soup. Here's to a happy and healthy new year!


Trinidad Fish Soup
Serves 4 to 5

1 two lb red snapper (sliced into 1" thick steaks)
3 limes
1 small onion
4 garlic cloves
2 springs fresh thyme
4 leaves shado-beni*
2 cups sweet potatoes, cubed
1 green banana, sliced into rounds (optional)
2 carrots, sliced
5 to 6 cups of water
2 whole scallions, chopped
1 large tomato, sliced into thin wedges


1. Squeeze two limes over fish, coat well and and drain off lime juice. Squeeze the juice of the additional lime and season with salt pepper,
2. In a food processor, grind onion, garlic, thyme, and shadon-beni. Add to fish, coating each side properly. Cover with plastic wrap and refrigerate for thirty minutes.
3. Get a large stock pot over medium heat, add the carrots, sweet potatoes, and green banana. Cover with water and bring to a boil. Reduce heat and simmer until the vegetables are fork tender. Season with salt and pepper. (Remember that the fish also has salt so use moderation here.) At this point, gently add the fish steaks to the pot. As soon as the fish is cooked through, (about 5 to 7 minutes depending on the thickness) add the chopped scallion and tomatoes wedges. Serve while hot with a slice of avocado (optional.)

* Shado-beni is found is most Trinidadian seasonings; every home cook uses it. It is sometimes referred to as Mexican cilantro and can be found in West Indian groceries. However, fresh cilantro can be substituted.

Wednesday, November 12, 2008

Pumpkin Nut Loaf


Some of my friends (the ones who have been around longer than I have) tell me that as we get older,  we tend to find gratification in odd, simple and, sometimes, mundane things. Wine, a good cup of coffee, a crisp fall evening, highway driving- I have at least two friends in their fifties who enjoy highway driving, in particular, the freedom that the road signifies.  Using this criterion, I must be aging faster than I look because my latest diversion definitely falls into the category of odd, simple, and mundane. I am fascinated with squash. Gourds. You know, pumpkins. (Although, pumpkins are just one type of squash, if we have to get technical.) 

Little did  I know that all it would take to capture my interest in all things ( all edible things) squash, would be a single visit to a pumpkin patch. That fateful visit happened back in October in Wyoming, Minnesota. (Remember A road trip, a fresh pumpkin, and a pie?)  Now, a month later, squash as become for me what a blank canvas is to an artist: a medium of almost infinite possibilities.  Cakes, puddings, gnocchi, stews, breads, soups, and not forgetting the ever popular pie; you name it,  it can probably be prepared with one of the many varieties of squash. 

Throughout the year, farmer's markets as well as the produce sections of many neighborhood grocery stores seem to come alive with all varieties of squash. While most are used as decorations especially at this time of year, a large number is edible. A few of my favorites are acorn, kabocha, butternut, but I can't wait to get my hands on the fairy tale pumpkin. Just as its name suggests, a mature fairy tale pumpkin is shaped like Cinderella's coach in the way that its segments are distinguished by deep ridges. Not to be confused with the cinderella pumpkin which also has deep ridges but whose top is more noticeably flattened. 

Stay tuned for at least one more "gourdish" recipe. Maybe I will be able to find a fairy tale pumpkin. Or not. Either way, the next recipe will be a sweet delight. Meanwhile, enjoy this hearty pumpkin loaf made with homemade pumpkin puree.


Pumpkin Nut Loaf
Makes on   8' x 4' loaf

1 cup whole wheat pastry flour
2/3 cup all purpose flour
1 tsp baking powder
1 tsp baking soda
1 tsp cinnamon
1/4 tsp ground nutmeg
1/4 tsp salt
1 egg plus 1 egg white
3/4 cup sugar
1/3 cup maple syrup
1/4 cup canola oil
1/4 cup skimmed milk
1 tsp freshly grated ginger
1 1/2 cups pumpkin puree (homemade or canned)* 
1/4 cup hazel nuts 
1/4 cup walnuts

1. Set oven to 350 degree F. Liberally grease and flour an 8' x 4' loaf pan and set aside. 
2. Coarsely chop the hazel nuts and pecans and toast in the oven for 10 minutes. Remove and set aside until ready to use. 
3. Combine  the flours, baking powder, baking soda, cinnamon, nutmeg and salt.  Set aside. 
4. In another mixing bowl, whisk together the eggs, sugar, maple syrup, oil, and milk. Slowly whisk in pumpkin puree and add the freshly grated ginger. Combine the flour mixture into the wet ingredients in two batches. Finally, fold in the toasted chopped nuts. 
5. Pour the  batter into the prepared loaf pan and using a spatula smooth the top. Bake at 350 degrees  F for 1 hour and 15 minutes or until the top is cracked and a knife inserted in the center comes out clean. Cook loaf in the pan on a wire rack before serving. 


*Homemade pumpkin puree: Wash and cut a 1 lb pie pumpkin into eight to ten segments. Remove and discard the seeds and stringy interior. Place the "cleaned" segments in a large pot with 1 to 2 inches of water. Set over medium high heat for 30 minutes until the pulp becomes soft and capable of being scraped out with a spoon. Remove pulp and puree in blender. Pour back into pot over medium high heat, and cook for 20 to 30 minutes to remove most of the liquid.

Saturday, October 25, 2008

I'm back with Stuffed Mushrooms


As you may have known, my sister had been visiting last month. Consequently, I have been so busy with her, sightseeing, shopping, helping her study for the SAT's (which is a mute point now since she was accepted to medical school- an international one) etc. So my blogged suffered; I had not been able to post since October 15th. I'm not complaining either because I enjoyed every minute spent with her. It is questionable, however, whether or not she enjoyed every minute with me. (Moody, exacting, and bossy are a few adjectives she would gladly use to describe me.)

She was thrilled with the restaurant scene in Minneapolis; a huge difference from what she was used to. Not only the setting but in terms of the variety. She also enjoyed my home cooking, something she didn't know much of since I left home before she was able to appreciate my recipes. Luckily, she devours everything I make; I little bit of affirmation that I, in turn, enjoy. This recipe was created just for her.

Tofu and mushrooms. Two foods eaten in Trinidad but not widely popular. Consequently, and coupled with the fact that she is sometimes a picky teenage eater, she was not particularly fond of the idea that I would "make" her eat it. ( One of the reasons I doubt she enjoyed every minute with me: there was no " I don't like that" protesting allowed when it came to healthy eating.) In the end, I won he over with fresh portabello mushrooms. "I have never meet a mushroom I didn't like,"she said.

Marina's Stuffed Mushrooms

15 to 20 baby bellas
3 large portabellas
12 oz extra firm tofu
1/3 cup panko bread crumbs
1/4 cup chopped scallions
1/4 tsp salt
1/2 tsp ground pepper
1/3 cup grated cheese
grape seed oil (optional)


1. Remove the tofu from its package and wrap in dry paper towels. Place on a plate and set another plate on top of it. Onto the second plate, set a heavy weight such as a can of beans. Place in the refrigerator for at least an hour. This step is very important because it removes most of the extra liquid from the tofu resulting in a crumblier and less soggy topping.
2.Set the oven to 400 degrees F. With a damp paper towel, gently wipe any dirt off the outer surface of each mushroom. Remove and discard the stems. Set on a well greased baking sheet or baking dish.
3. Remove the tofu from the refrigerator (from its homemade "liquid extractor") and crumble into a bowl, either using your hands or a fork. To this crumbled mass, add the cheese, scallion, bread crumbs, salt and pepper. Mix well.
4. Fill each mushroom cap with the crumbled tofu mixture, and drizzle lightly with grape seed oil, if using. Bake for 15 to 2o minutes until lightly golden brown on top.